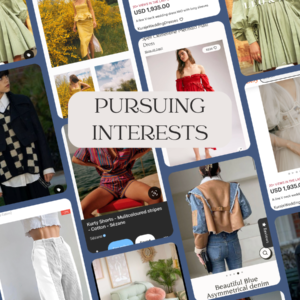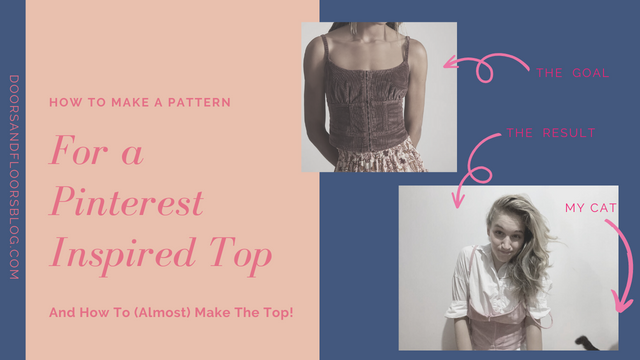
As a follow-up to last week’s post Pursuing Interests, where we talked about chasing our wildest creative dreams and we all jumped aboard the Doors and Floors hype train. I thought surely this week we should release a tutorial on how to DIY one of these interests of mine.
I’d like to clarify that the keyword in that sentence is “Thought.” I thought surely we should…and we almost did! But…well, let’s rewind a little bit.
This post may include affiliate links.
Please read my disclaimer page for more info.
*As an Amazon Associate, I earn from qualifying purchases.*
Approximate time to completion: Unknown, we’re 4 days and 7 hours in already
What you’ll need:
- Patience
- A little imagination
- Paper
- A pen
- A ruler
- Fabric tape measure
- Scissors
Disclaimer: I am trying to teach myself the Metric System, so I will always try to include both measurements in my tutorials, i.e. centimeters and inches, meters and yards. Though in my everyday sewing life lately I have been using them rather interchangeably, I apologize if I miss including both or switch between the two too often.
Pinterest Inspirations
I have a Pinterest board titled “Art ideas” with probably 400+ ideas in it. Granted, some are multiple saves of the same piece in different angles, so I can do my best to replicate it. While other ideas in there I plan to create as is or combine multiple ideas into one piece, more on that in a future post.
With the deadline for when I have to have this post up rapidly approaching–four days ago, I scrolled through my collection and picked the best possible thing I could find that I thought I could complete in that amount of time. Honestly, it wasn’t even what I originally wanted to create with this short amount of time. But the easiest thing to make (perhaps a cat toy) wasn’t something I figured I could get away with after doing a whole “Chase your big dreams” speech last week.
Way to go applying pressure past self.
So for plan B, let’s make this top!
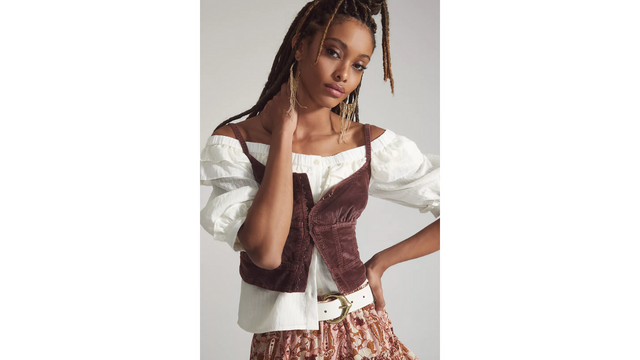
This Anthropologie top no longer seems to exist on their website, and I could only find a total of two pictures of it. Neither of which showed the back.
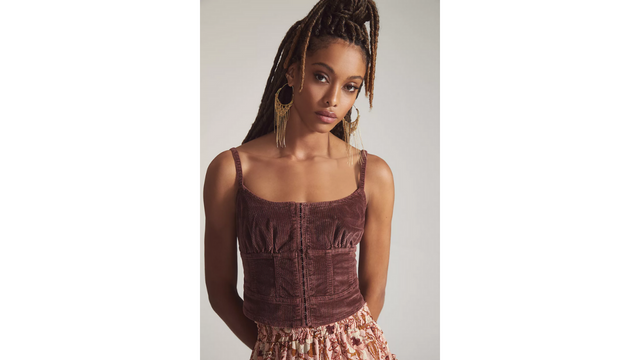
But it’s cute and doable in my mind…if maybe I had a week and a half or two.
At this point, I have like three and a quarter days.
So here we go. Sorry, excuse me–here we go! Let’s do it!
Enthusiasm is everything.
How To Make The Pattern
I set out to be your best friend by trying to document my thought process and how to measure yourself properly for this top.
The design for patternmaking seemed pretty simple. I guessed the best way to make it was by dividing the top into three separate blocks.
The Middle Section
Don’t even ask why we’re starting with the middle and not with the top or bottom piece, which sounds more logical. This is just how my brain works, okay?
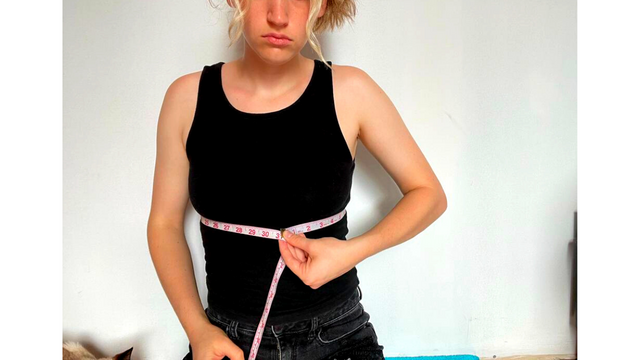
To make the pattern start by taking your under-bust measurement with a fabric tape measure.
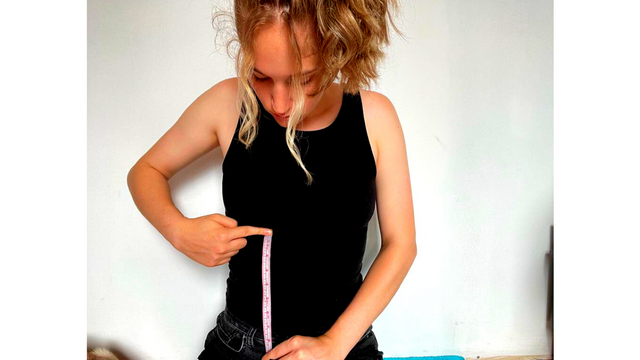
Additionally, take a measurement from under your individual breast to where you would like that middle section to end.
This could stop right at your waist, but remember that we are going to add a piece of fabric to the end for the bottom piece, about 2″ (5cm) tall. If you want this very cropped, stop above your belly button. Or if you want it closer to a normal length top with only a little midriff peeking out, stop at your belly button or below.
Taking your underbust measurement divide it by four and draw a rectangle that width. I recommend you add .50″ (1cm) to 1″ (3cm) of length to one end if you don’t want your top to be fitted. This will also help when attaching the hook and eye tape. Do note that you don’t want to add too much length, as you will need to cut multiple of this pattern, meaning if you add 1″ (3cm) to your pattern you will end up with an additional 4″ (10cm) around your complete top.
The height of your rectangle needs to be the measurement that you determined from under your breast to your belly button or wherever you determined you wanted the middle section to stop.
Next, divide this rectangle by three if you want equal portions. I was looking at the picture and it almost looks like the front rectangle at the center front was a tad smaller.
I first made the right rectangle by eyeballing what looked like a nice, slightly smaller portion. Then I divided the rest of the rectangle into two smaller rectangles.
You can add seam allowance and redraw the whole thing if you want, I didn’t want to waste any more paper so I cut these out and made a mental note to add my own seam allowance to the fabric when I cut.
The Bottom Section
To make the bottom strip you’ll just measure the same length as the middle section piece, or trace your middle pattern piece to match the width. You’ll want the height to be about 2″ (5cm).
Remember to add seam allowance when you cut or redraw your pattern. Oh! Or better yet, don’t draw your pattern on the corner of the paper, then you wouldn’t have to cut a new piece of paper.
The Top Section
For the bust piece, I took my bust measurement around the nipples, divided this by four and drew a rectangle. For the height, I measured my breast over the nipple from under the breast to above the breast where I would want the cup to start and end. Be sure to add .50″ (1cm) to 1″ (3cm) to the total length so we can add pleats and sew the hook and eye closure tape at the end.
I originally added quite a bit of extra length to the bust measurement because I was thinking the pleats would need it and for the hook and eye tape. But after experimenting with it I ended up cutting off almost all of the extra length I had added and I curved the very top a lot lower.
Not to fast-forward too much, but my end result showed me that I still had too much fabric at the top and I ended up with a very boxy fitted cup. I would still recommend you start with a smaller curve and experiment with it on your body to find how much you need to cut it to fit you.
I eyeballed my top angles, I have no measurement reference for you on that one. Again, I recommend you play around with it by holding it up to your body. Remember that you will need to account for seam allowance and leave enough fabric on top to add a hem.
Remember that this curve is to shape the top, but you will also need to add height to your armpit side for the strap, and include a straight center front line for the hook and eye tape. See the photo below for reference to the strap and curve on the cup piece.
Also, make sure your curve in the center ends on a downturn, my end result looked wrong because it curved up instead of down.
How Much To Cut
Of each of the front middle and top pattern pieces, you’re going to need to cut two.
For the bottom pattern piece, you’re going to cut two of this piece and one on fold, that’s what I did. Or better yet, just cut one long strip the complete length of the measurement you would get if you made four pieces of paper this size and taped them together.
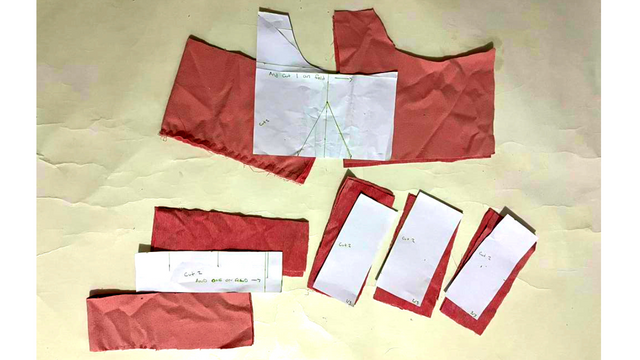
And here’s where I made a mistake. I forgot about the back pieces.
For the center back, lay your three center pieces together and cut one piece the complete length of those three pieces. Make sure you cut this on fold.
For the top back piece I wanted it to be a little shorter in the back, so I folded my bust piece into a perfect rectangle at about 3″ (7.50cm) height and cut one piece, with seam allowance, on fold.
One additional thing, you’ll need to cut straps, seems so obvious, but what didn’t I cut? Yeah…
I wanted to make these as skinny as possible, but corduroy is thick, and I did not feel like fighting with an itty bitty strap to turn it right side out after sewing, so I cut a long strip of fabric on fold, as skinny as I was comfortable sewing, this was maybe .75″ (2cm) when folded.
I should note that I later messed up something and ended up making my straps skinnier by sewing them in half. So if you noticed the photo doesn’t look like the straps are as wide as I just described, they aren’t. But that’s another topic for the tutorial post.
Some Tests
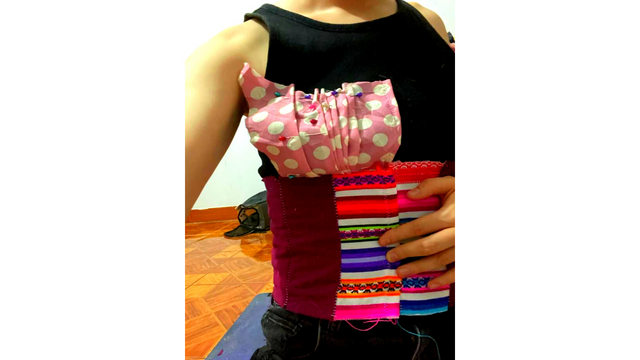
I did a quick test of my pattern on some scrap fabric. The photo above shows a skinnier strap and a longer strip with pleats on the top and bottom. The pleats are also too center front.
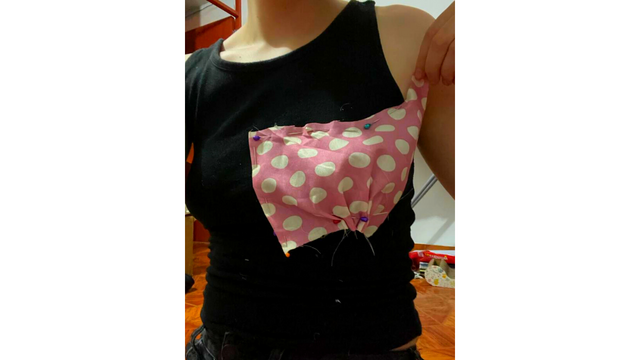
I liked the pleats on this one, but widened my strap and curved the top of the cup more when I cut the real fabric. Notice the center front piece ends straight, that’s what you want, I added too much curve and didn’t level it out on my good fabric.
I applied these tweaks to my pattern, all mentioned above in the pattern making tutorial I gave so you could make the top the proper way the first time. Without testing the tweaks a second time I jumped straight in and cut up my real fabric. My real fabric actually happens to be scraps from another project, but apparently, it was still a premature commitment to cut “The good fabric.”
Things went great for the record. I fully believed I would be editing my post for you right now. …Okay, I doubted a little when things got crazy busy yesterday and I hadn’t finished the top or taken pictures yet. But other than that I never doubted myself!
And then I did it! It looked amazing! Queue my internal scream and happy dance!
However…here we are and it didn’t work right. It didn’t work right at all. Queue my internal scream and sad face.
Somehow my top dreamed I had bigger boobs than I really do. Way to go top, proud of you for dreaming a little.
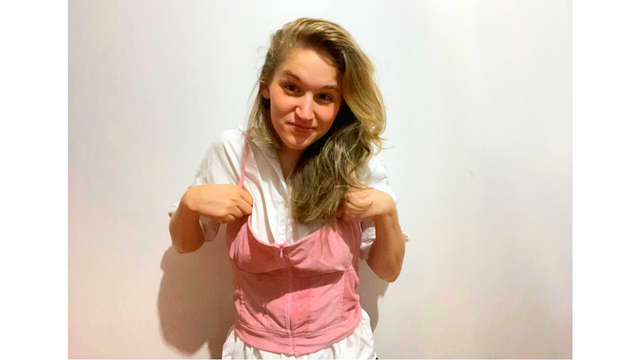
My straps were too long, as I didn’t double check the length on the top, only an approximate held against my back. I was in a hurry!
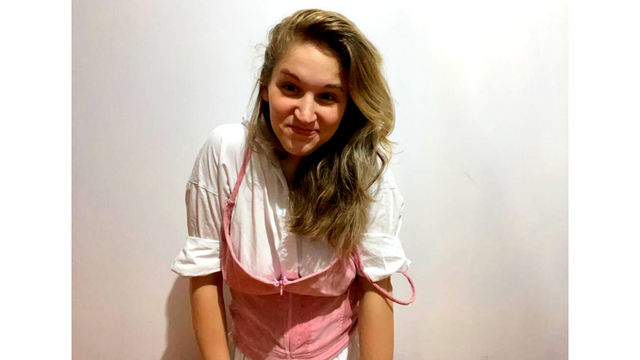
The front piece was supposed to be a bra hook and eye closure, but as I hadn’t planned on making the top now, I didn’t have what I needed. I did have a pink invisible zipper that I had originally planned on using with this fabric when this fabric was intended for another project.
However, this invisible zipper was too long to begin with (I shortened it) and then I remembered that this is the wrong type of zipper. I needed a zipper that would open at the bottom.
Because of the zipper issue, I literally had to get my husband to help me into and back out of the top.
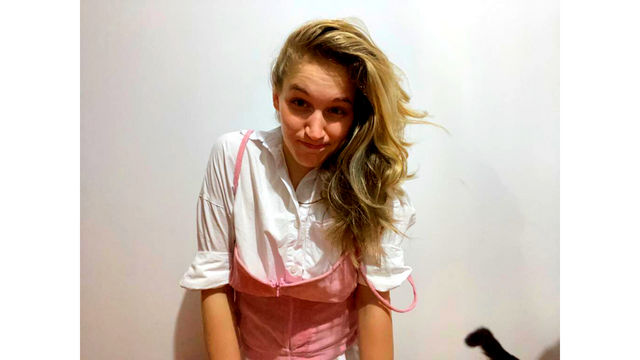
Aside from these unfortunate events–honestly, the top did turn out gorgeous. With a few tweaks, I’m sure I can perfect it and get this tutorial out to you soon.
Please note when I say “Perfect it” I do not mean that it will be perfect…as I’m not a professional at this and I make this stuff up as I go. But can I get at least one star for making it pretty darn good?!
I hope you give this pattern a try. Be sure to get your pieces ready-we’re planning on finishing this top in next week’s post! Check back soon for more sewing adventures!
And always remember, it’s okay when things don’t go the way you wish they had. Give yourself time. Breathe. Dream. And go create some more.
A messed up project never has to be the end of everything. In fact, this is a scrap project for me, this is literally it on it’s second life, as my first project didn’t work out right. It’s totally okay to start new or take breaks. Go easy on yourself and remember to be patient.
Let me know in the comments if you’d be interested in more honest posts about flip-flopped projects, or if we should stick exclusively to the good stuff with the pretty end results.
Be sure to check out more sewing projects here.
And if you decide to give this project a go, tag me on Instagram @doorsandfloorsblog and use the hashtags #SewingCat and #D&FBlog so I can see what you make!
P.S. I realize that there are no pictures of my sewing cat in this tutorial-aside from her tail in one of the pictures above-but believe me, she was all over this project and there will be a collection in the coming tutorial.
