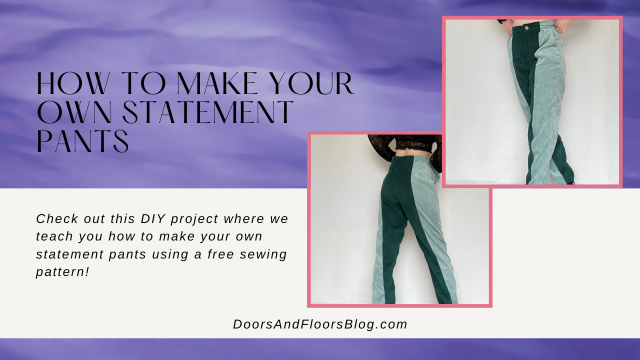
Let’s make some statement pants today, using a free sewing pattern I got from Sew Mag UK. The Peggy Trousers are designed by Posner and Posner and are ideal for corduroy fabrics, according to the website. Considering corduroy is the type of fabric I’m planning on using, this pattern sounded pretty much perfect!
Last month I challenged you to join me for the #UseUpYourStashChallenge and this month I’m delivering my first item. I apologize for the delay, but it took me almost three weeks to pick a pattern, sew and take pictures of the finished result.
I’ve been planning to make this item for almost a year now, and have had everything on hand, I’ve just never made time for it. With this challenge, I knew it was time to finally make these statement pants. Which in all honesty, is partly why I made the challenge in the first place. To make time for my projects and do some sewing for me.
While I have loved the idea of making these pants, I’ve been a little hesitant because I didn’t want to make something that I would never wear. I’m determined that if I make something, I better use it too. I’ve found the best trick is to do a little photoshoot to come up with some ideas for how I can style it. Which, surprisingly I was able to come up with not five but 19 different ways to style these statement pants! In my eyes, that makes this a successful project! I’ve already worn them a couple times since making them and I’m so proud of how they turned out!
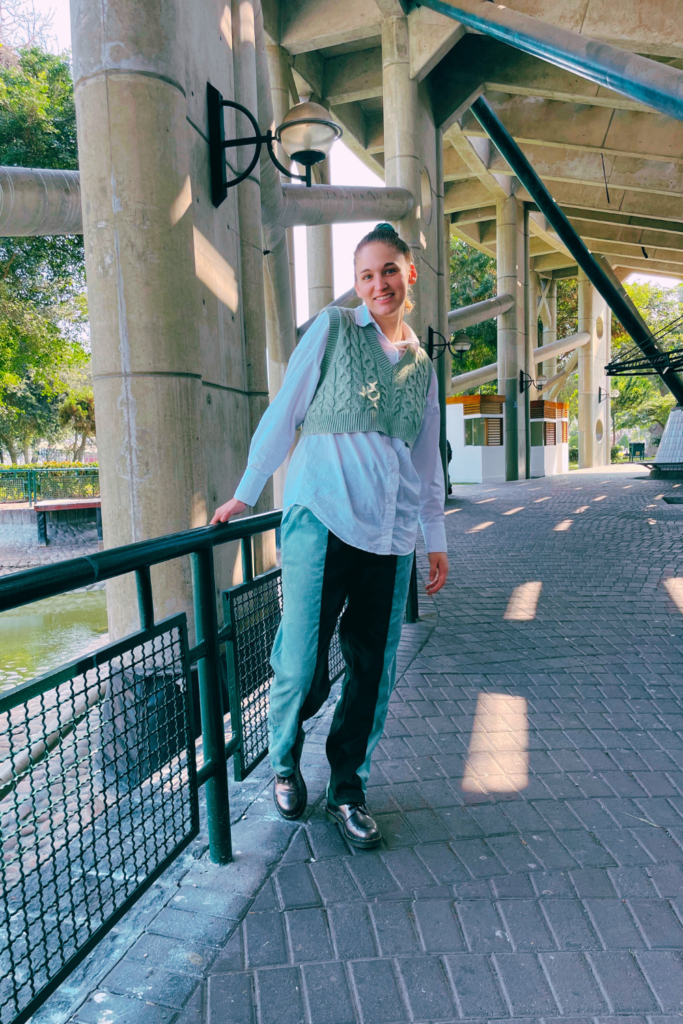
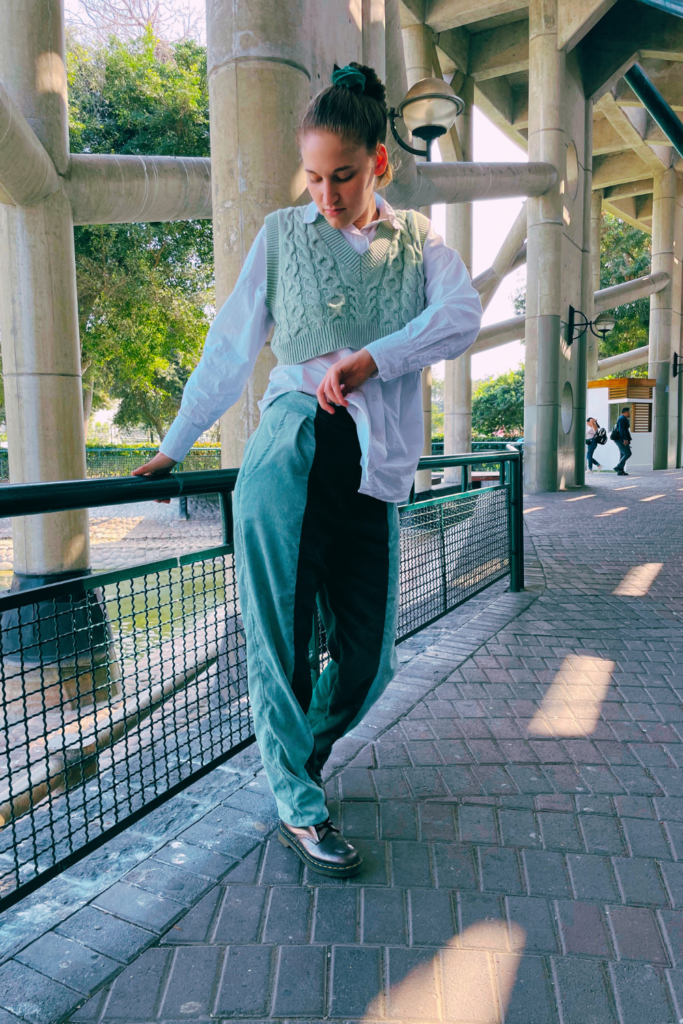
This post may include affiliate links.
Please read my disclaimer page for more info.
*As an Amazon Associate, I earn from qualifying purchases.*
Approximate time put into this project: 2.50 – 3 weeks, with about 2-3 hours put into the project each night on weekdays and 5-7 hours on weekends.
What You’ll Need:
- Fabric in two different colors – 2 meters
- I would recommend a heavier-weight fabric. You could use corduroy, or denim in two different colors. I probably wouldn’t mix the two.
- Matching thread for each fabric
- A pants zipper, approximately 7″ (18cm) – 9″ (23cm)
- Stud button/jean button
- Make sure you get the one that can be installed via hammer, something like this
- A hammer
- Sewing machine
- Sewing pins
- Straight stitch foot
- A pant pattern
- I used Sew Mag UK’s Peggy Trouser (I hope I’m saying that right!). There are quite a few free pant sewing patterns on the web if you feel like looking. This same technique should work regardless of what style pants you choose.
- Fabric tape measure
- A ruler
- Scissors
- Highlighter/pen
- Tape
Disclaimer: I am trying to teach myself the Metric System, I will always try to include both measurements in my tutorials, i.e. centimeters and inches, meters, and yards. Though I have been using them interchangeably in my everyday sewing life lately, I apologize if I miss including both or switch between the two too often.
The Plan And Pattern
In our post on Pursuing Interests, I mentioned a few projects I’m eager to work on. These statement pants are one of them!
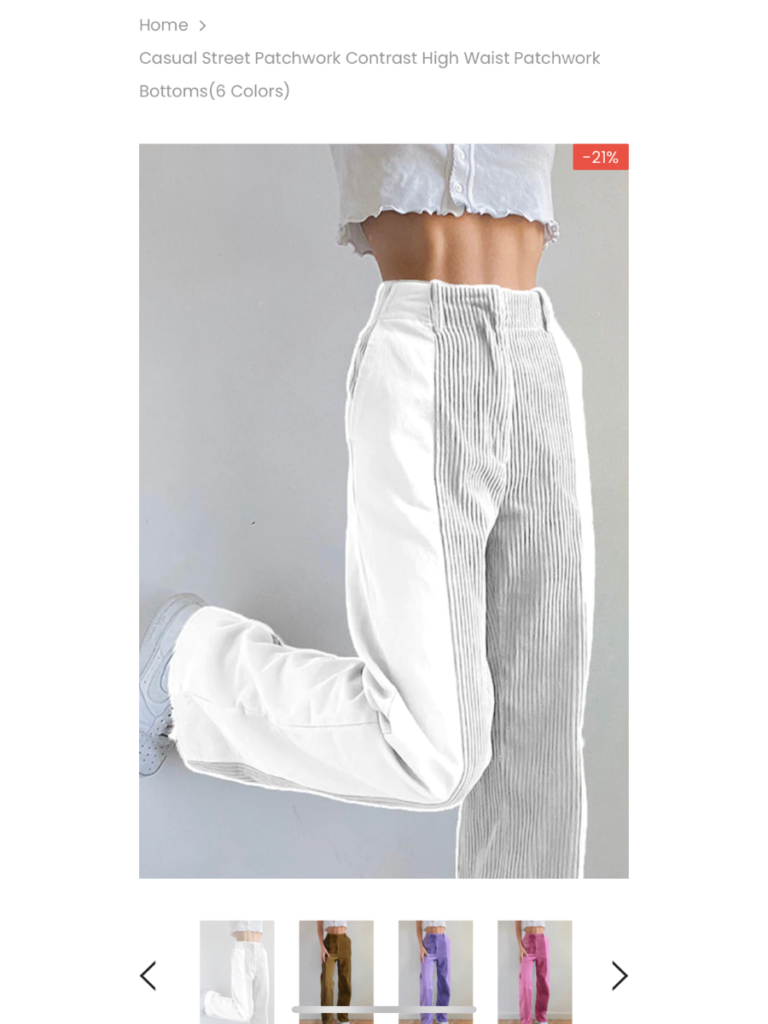
Sew Mag UK has very short and straight-to-the-point sewing instructions on its website. Because of this, I won’t go into every detail on how to sew these trousers as this isn’t my pattern. I will touch on a few things for customizing your statement pants and a few tips I learned along the way.
Let’s get into sewing our very own statement pants!
Prepping Your Pattern Pieces
Start by printing your pant pattern and taping everything together.
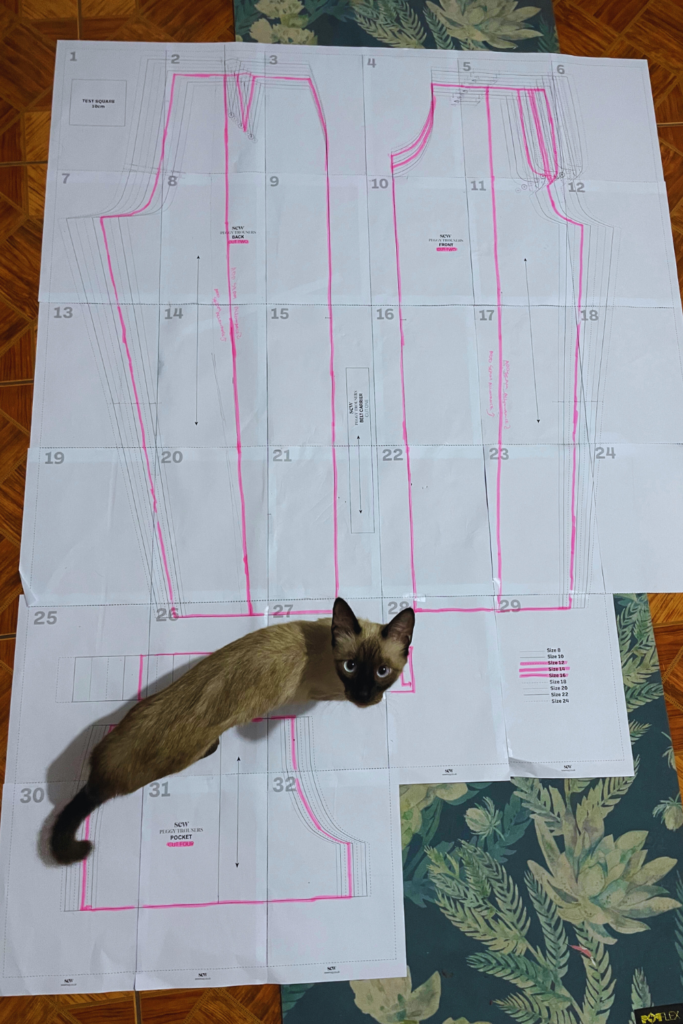
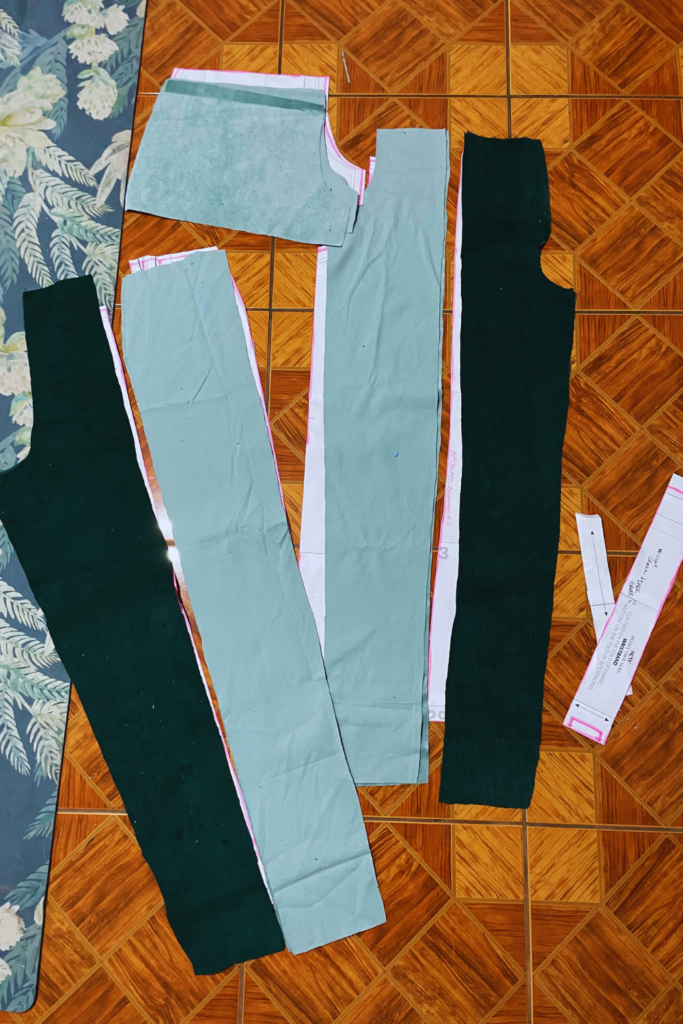
I like to get out a highlighter and highlight the size that I am planning to cut out. Then grab your ruler and draw a straight line up the pattern. This will be the division on your pants. You can make this anywhere you like, or even try a different color for each leg!
Measure from the crotch seam and booty seam on yourself to determine how wide you want the center panel to be. Then mark the same measurement along the identical seam on your pattern paper. From that mark draw a straight line down. My measurement was about 4.50″ (11.50cm) wide. Make sure the line is the same width on the crotch/booty seam on your paper. It makes the end result look more professional.
Once your lines are drawn, cut out all your pattern pieces.
Remember to note on the paper pattern which piece is supposed to be what color and note what pattern piece each is. For example, Back 1/2 light green, Back 2/2 dark green. This helps keep things from getting confusing. Make sure you note how many pieces of each you’re supposed to cut as well. If your pattern piece says two and you cut each pant leg pattern piece in half, you’ll need to cut two of each piece.
Tweaks And Notes
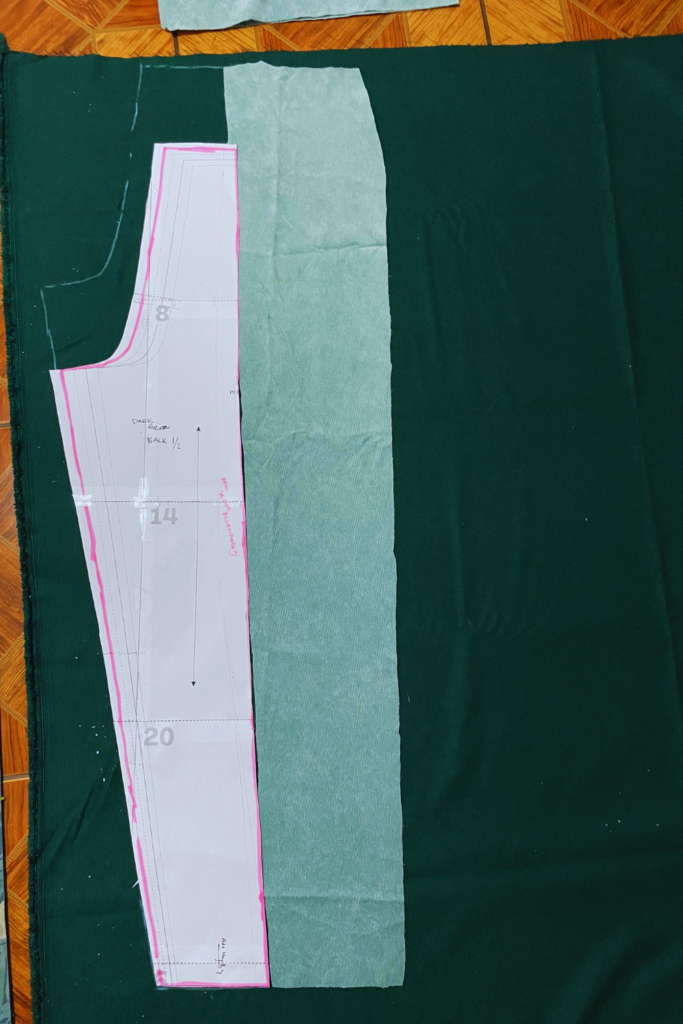
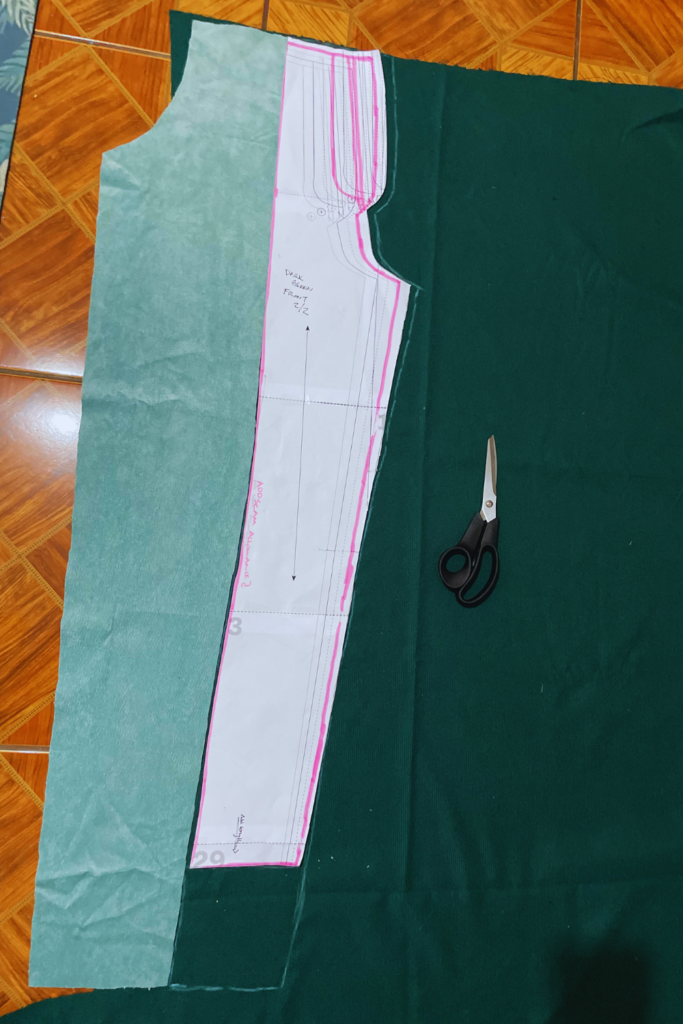
Here are some tweaks and things you should know about…
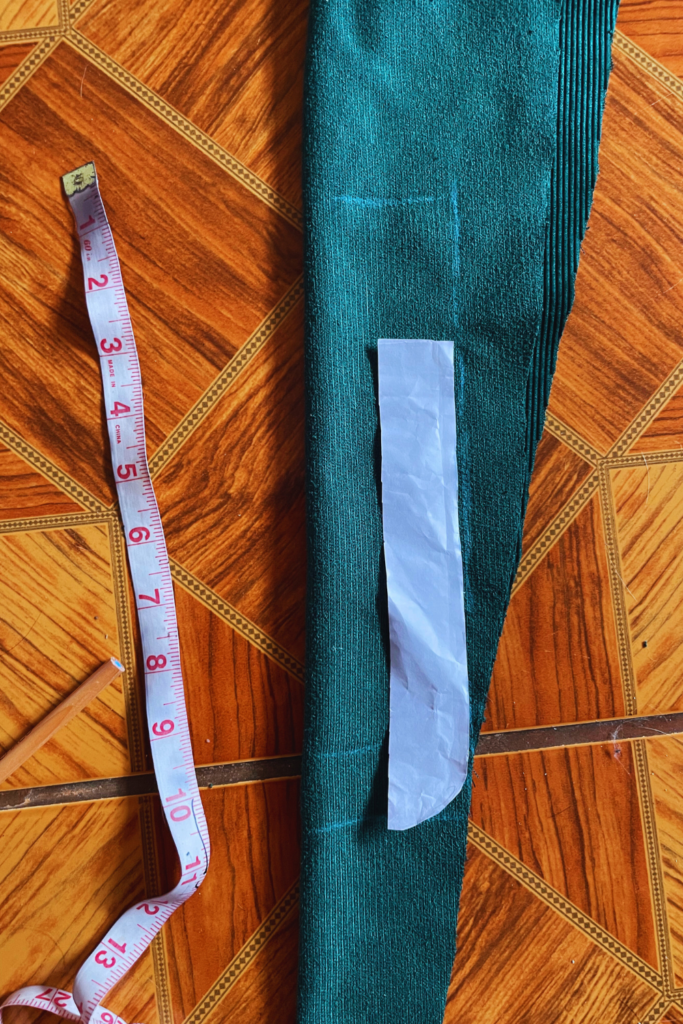
For starters: If the pattern isn’t long enough for you, measure how long you want your pants to be and add that, plus 1.50″ (4cm). This extra length on top of your need is for hemming the bottom cuff. Pants and patterns aren’t one size fits all, make sure you customize them to your needs! Above I put a couple pictures of how I drew the extra length onto my fabric.
Secondly: Because we cut each of the pant pieces in half, you will need to add seam allowance into the pant along each side and place where we cut them apart. Add .50″ (1cm).
NOTE: If you’re using corduroy, make sure you cut all of your fabric in the same direction.
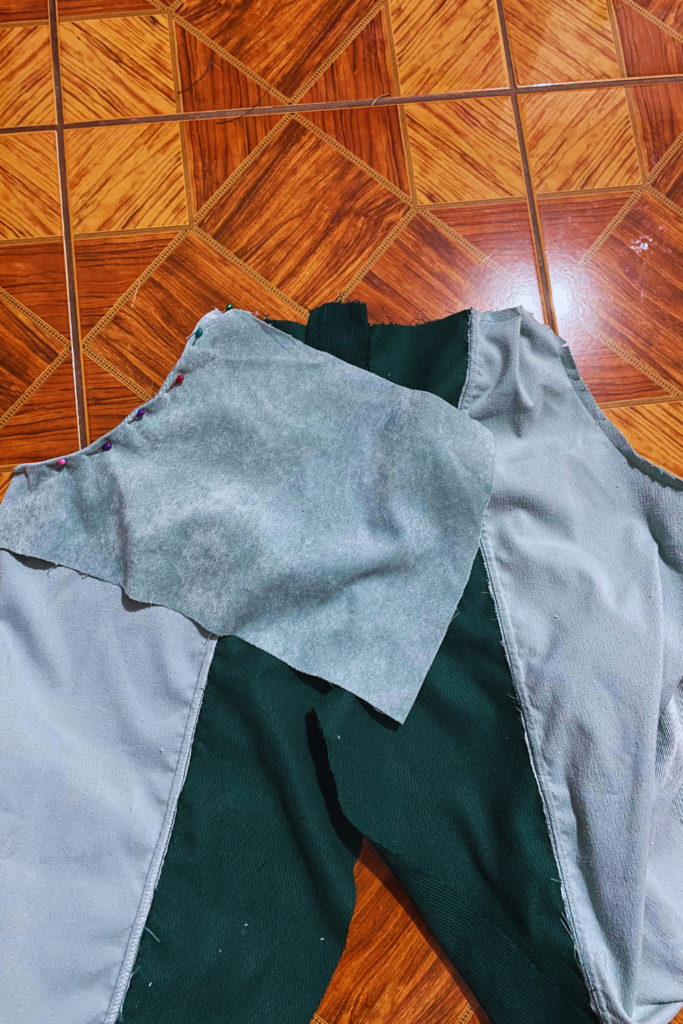
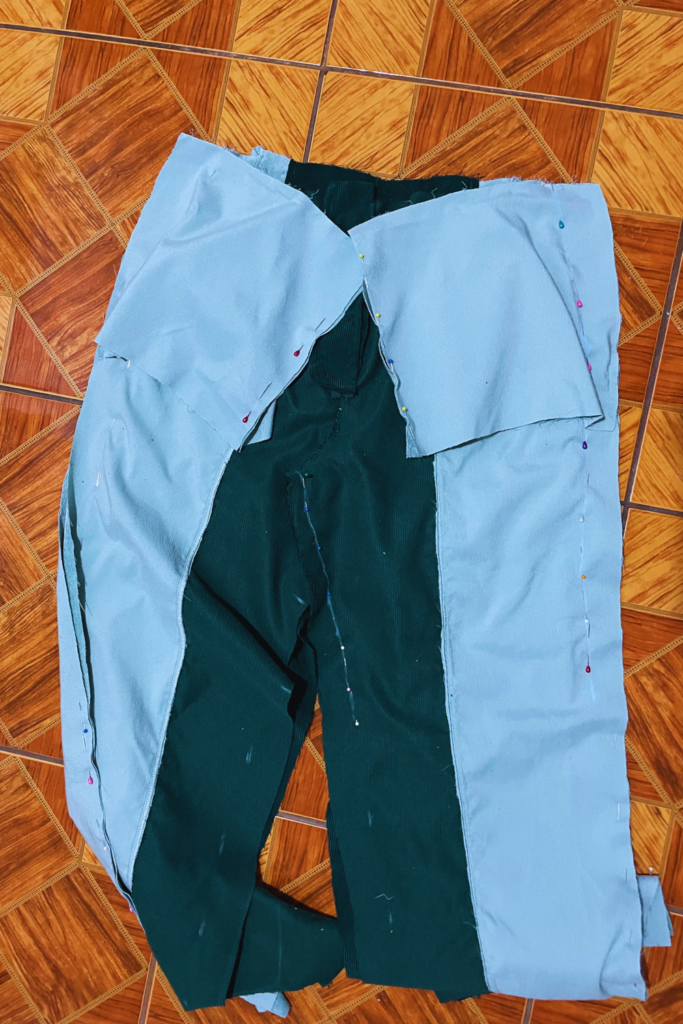
SIZING: According to the size chart provided in the pant pattern I used, I was between a size 14 and a size 16. However, I found the pants to be way too big when I started sewing them. If you use the same pant pattern as I did, make sure you take your measurements to determine your size. Even if you know going into it that it will be too big, it’s better to have it too big than too small. I found it super easy to take out all the extra fabric (as shown above). It did not end up being an issue, nor did it mess up the design of these statement pants.
Additionally, the pockets were very big and overlapped in front of the zipper creating a bulge. After you sew your pockets in, before you sew the open edge to close up the pocket, I recommend you try the pants on to see how small you’re willing to go with the pockets. Cut them back enough that they don’t overlap in the front, or however you’re comfortable.
THE RISE: This pattern is very high-waisted. If I put the finished pant on and pull it all the way up it touches my rib cage. The front crotch seam is so long! I debated about shortening the crotch seam from the bottom after I took out the excess fabric around the legs but wanted to wait until I tried on the finished pant to see how I liked it. With the finished result, the long crotch seam doesn’t bother me so much. I may change my mind in the future, but for now, I’ll keep it as is.
Sewing The Statement Pants
After you cut out all of your pieces you’ll want to sew each of the main pant pieces that you cut apart from the pattern, together into the proper pant panel size. Make sure you overlock or zig-zag stitch all seams and top stitch to add extra detail and create a more professional end result. Remember to switch threads as you go. Having a thread color that seamlessly blends into the pant really brings the statement pant together!
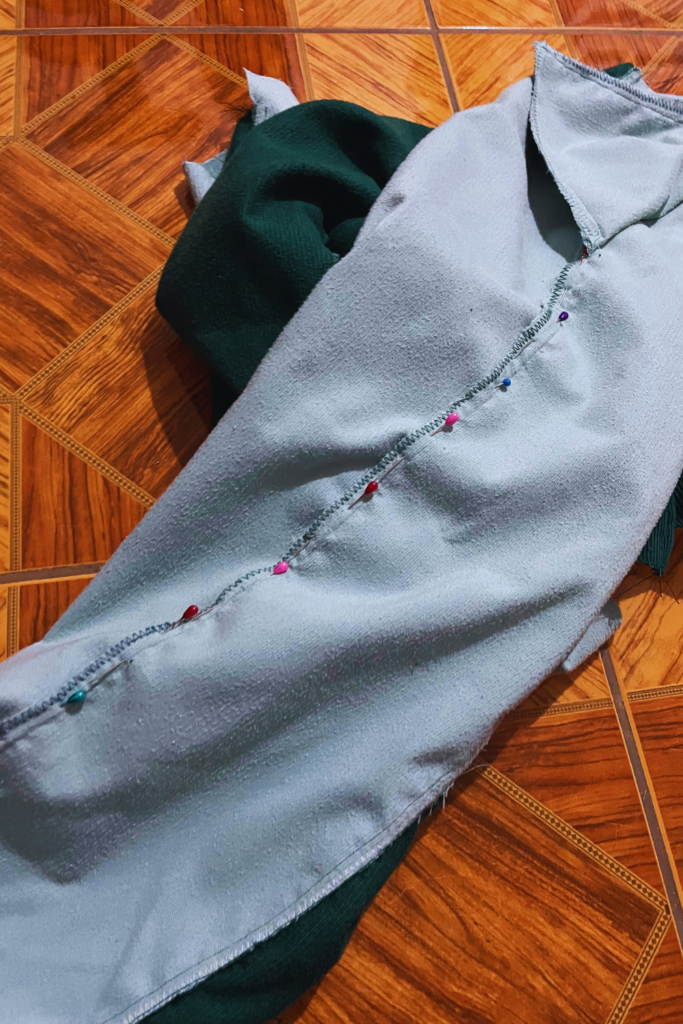
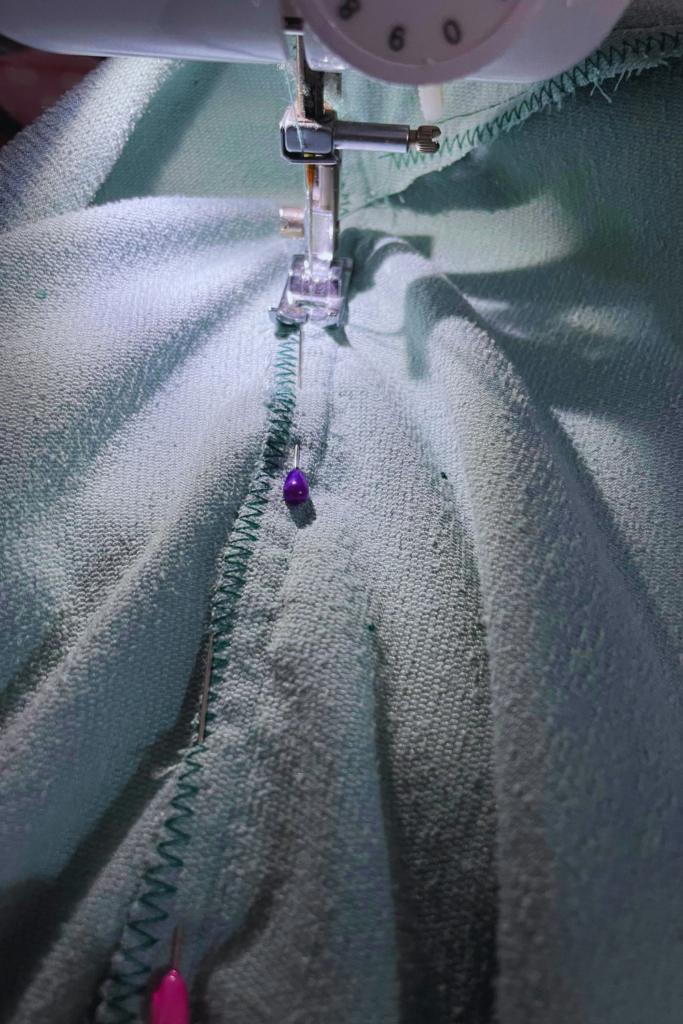
NOTE: It is easiest to sew all of your top stitches before you sew closed the legs. In my case, I sew it from the inside of the pant to achieve the same result, I find it easier this way. However the point still stands, if you try to sew the decorative seam detail afterward, you’ll end up struggling and have to do some fancy maneuvering like in the picture on the right.
When you get to the point of sewing the leg seams together, do the inside leg seam first with all of the zig-zag/overlocking and top stitching, then sew the outer leg. I messed this step up and was unable to sew the top stitches on the inner leg seam.
Continue sewing the pant by following the pattern instructions from the website. Remembering to zig-zag or overlock and top-stitching all seams as you go.
Sewing The Zipper Section
Most of the instructions were easy to follow from UK Sew Mag’s site, I’ll pop in a few pictures of the process. One area I do want to specifically dive into is the zipper installation. There did appear to be one piece missing from the pattern pieces and I found the instructions to be a little confusing in this section.
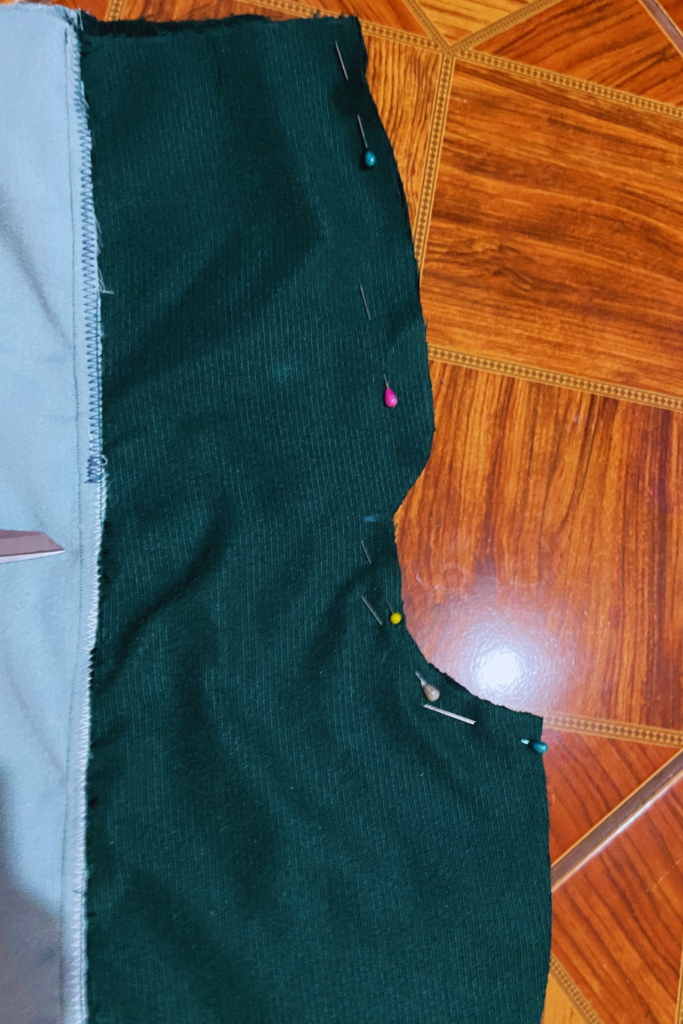
Pin the front crotch seams together, good sides facing, and sew. We will stop at the top where the crotch seam curves into the zipper flap. Then sew a basting stitch straight down the zipper flaps, connecting to the crotch seam stitch you just made.
I found the pattern instructions never mentioned creating a zipper flap to go inside the pants. This is so that when you unzip your pants they don’t just fly open with nothing directly behind it. I made my own by measuring the zipper flap on the pant piece, cutting a piece of fabric on the fold, and adding some seam allowance.
Pin your zipper flap with good sides facing and sew the straight line down through the curve. Don’t sew the top edge closed. Then turn your flap right sides out and top stitch around the curved edge.
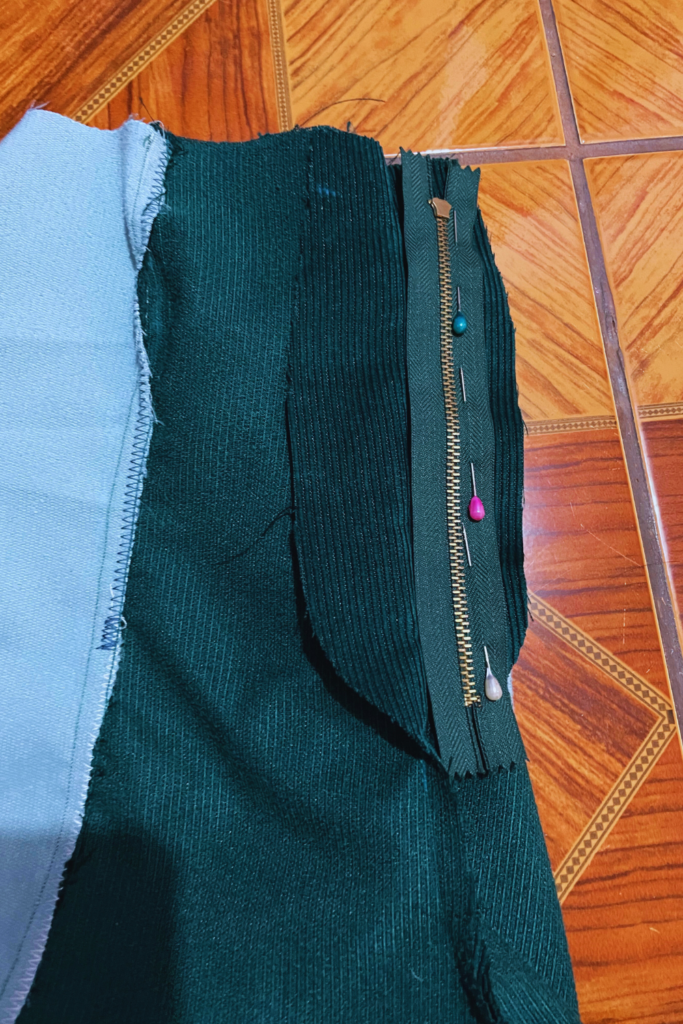
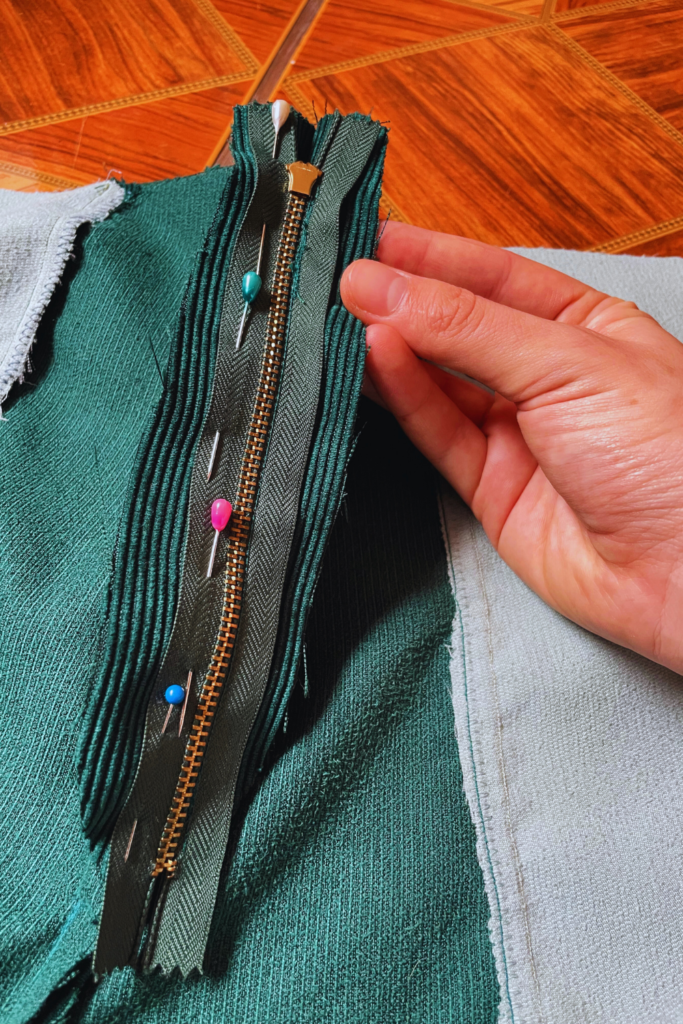
Open up the fly flaps on the pants and place your zipper along the seam, with the good side of the zipper facing down. You will want the left side of the zipper to touch the center seam, as pictured above on the left. The zipper should be placed where your basting stitches started next to the crotch seam. Before you sew make sure you are only pinned to the flaps, you won’t be sewing through the pants.
Sew as close to the zipper teeth as you can get. Then pull the zipper over to the other flap and do the same thing. Make sure the right side of the zipper lines up with where the center seam is, pictured on the right.
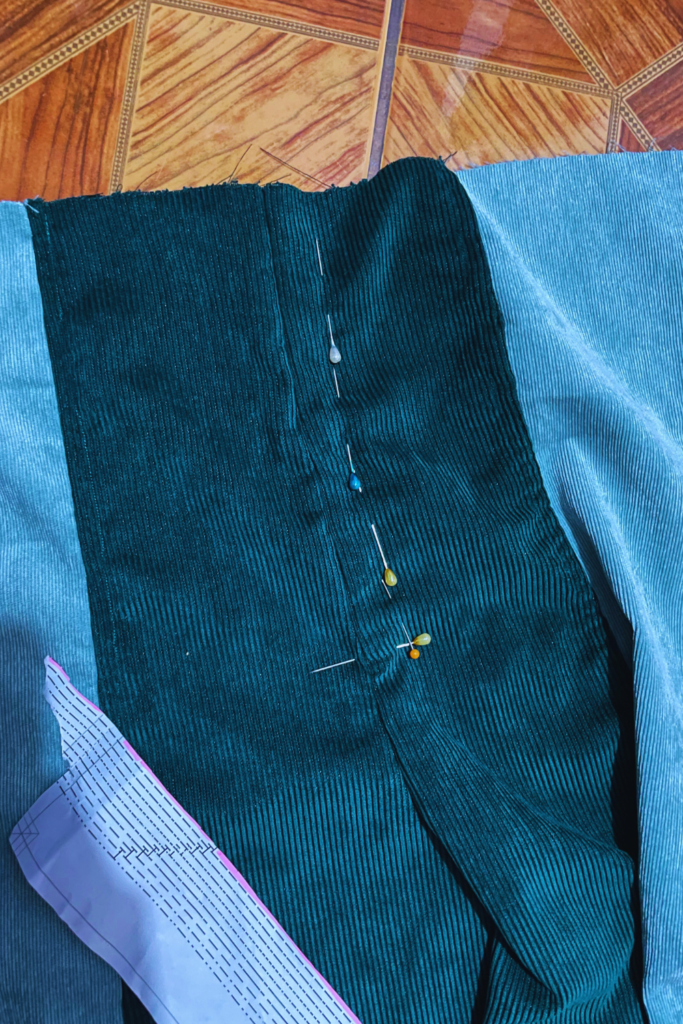
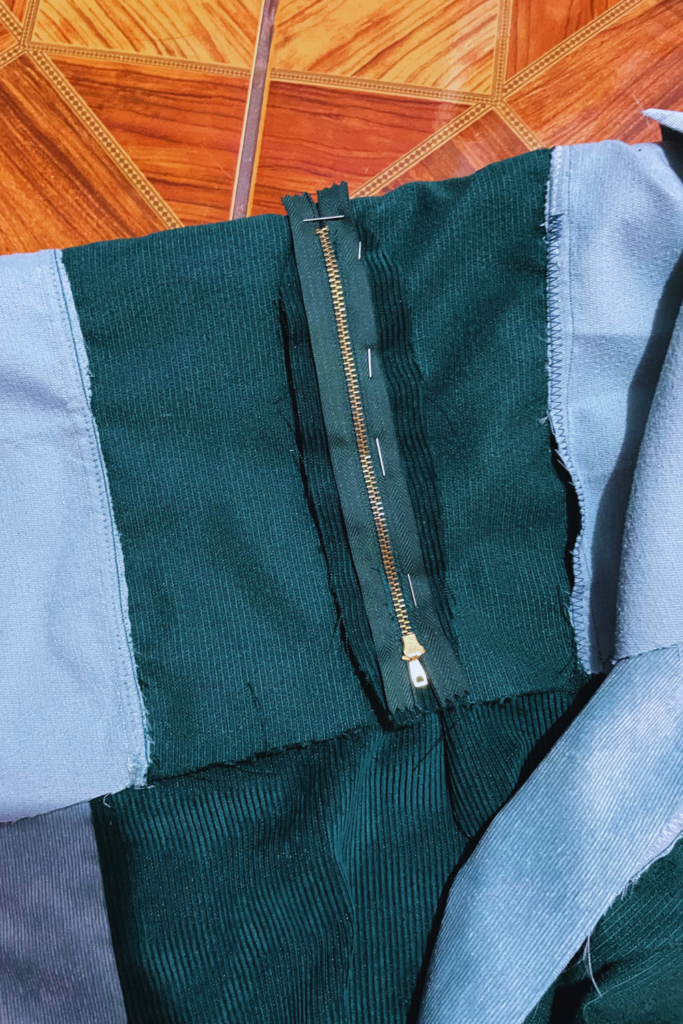
Moving to the outside of the pants, push all the zipper flap fabric to the right side and pin it down, creating an outline for where you want to sew. Notice that my sewing pins go alongside the zipper and under. We want to catch it, but not sew over the teeth.
The reason you pushed all the zipper flap fabric to the side is so that when you unzip the pants it opens up with nothing blocking it. It will also open properly behind the little flap we’re about to create by top-stitching the zipper outline.
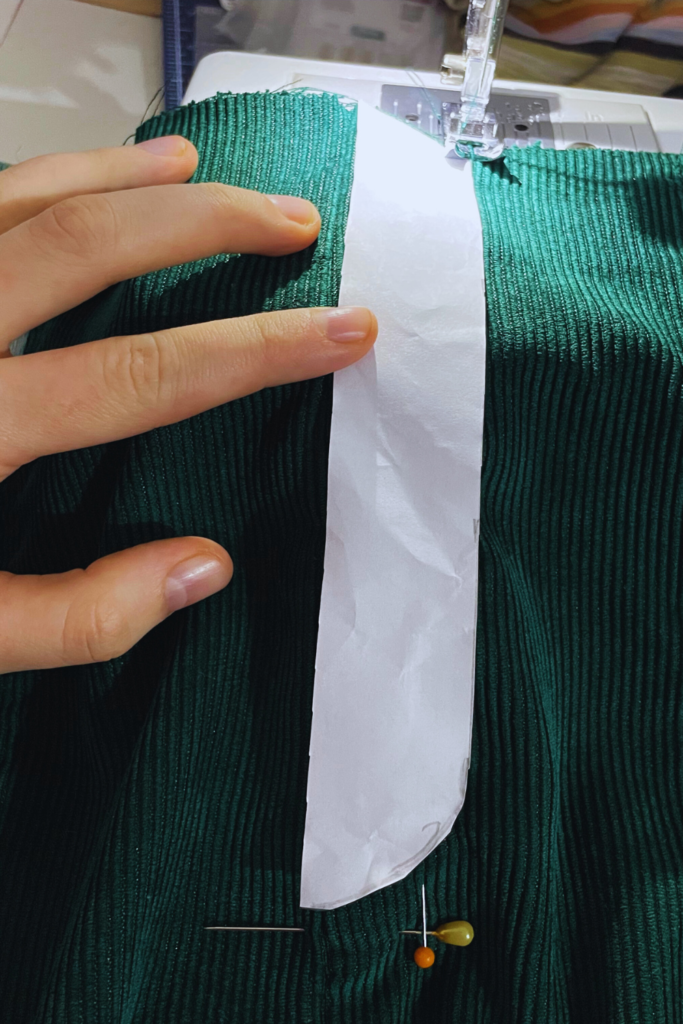
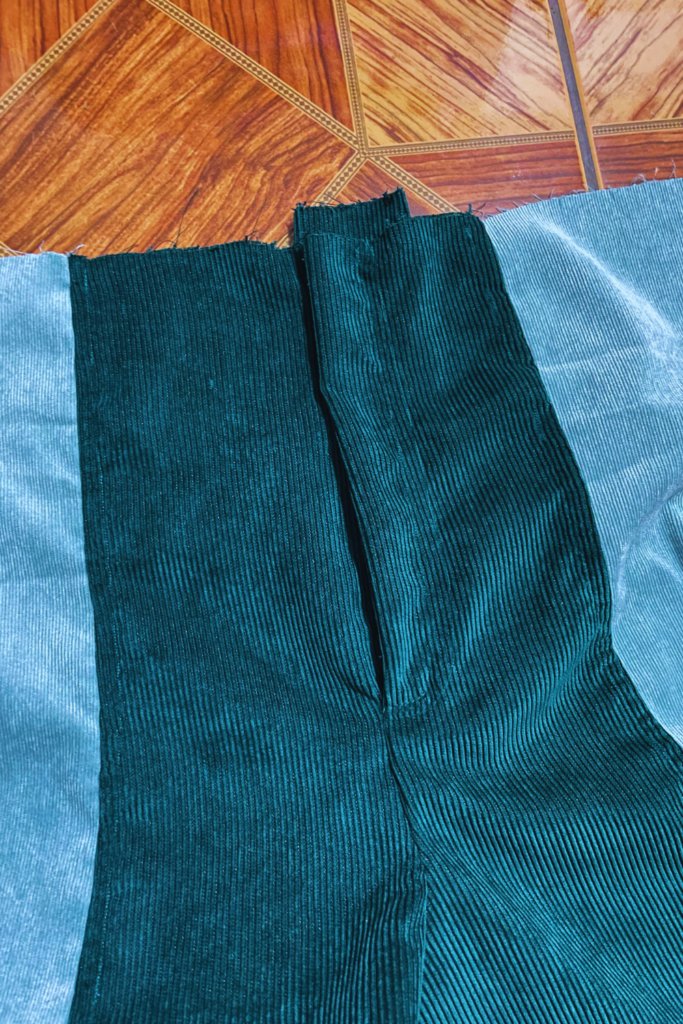
Sew two lines around the outside of the zipper to create the zipper flap. I don’t know if you can see it in the picture on the right, but it’s there if you look really closely. You can use your zipper flap template from earlier to make it easier to sew around the zipper teeth. This will also ensure you don’t accidentally sew over them and will help keep your lines straight.
Take out the basting stitches and open up your zipper to make sure everything looks right.
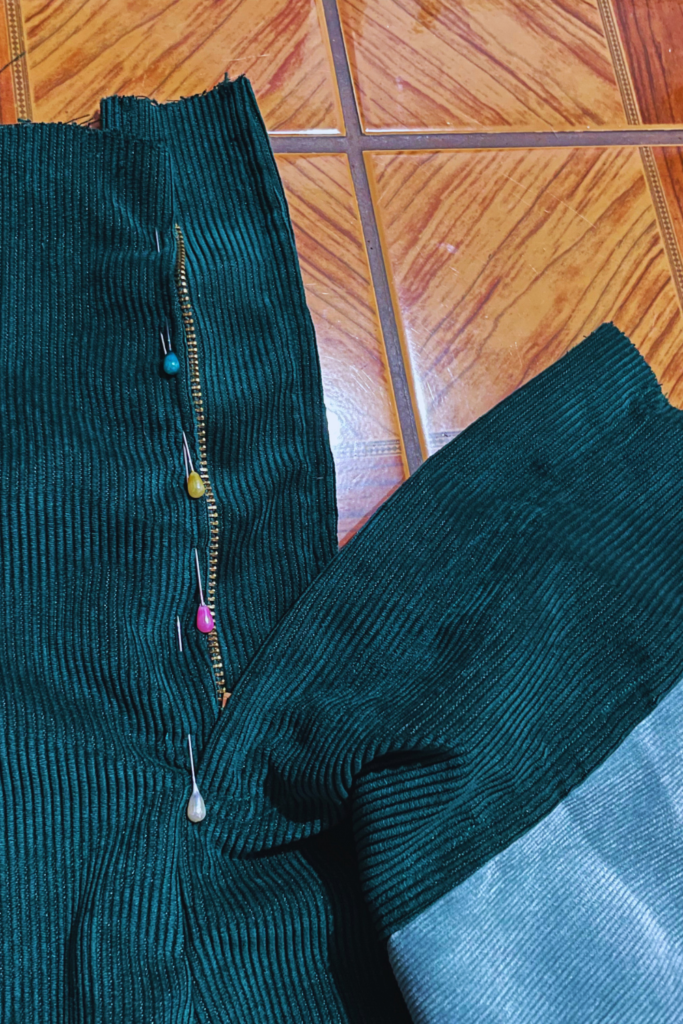
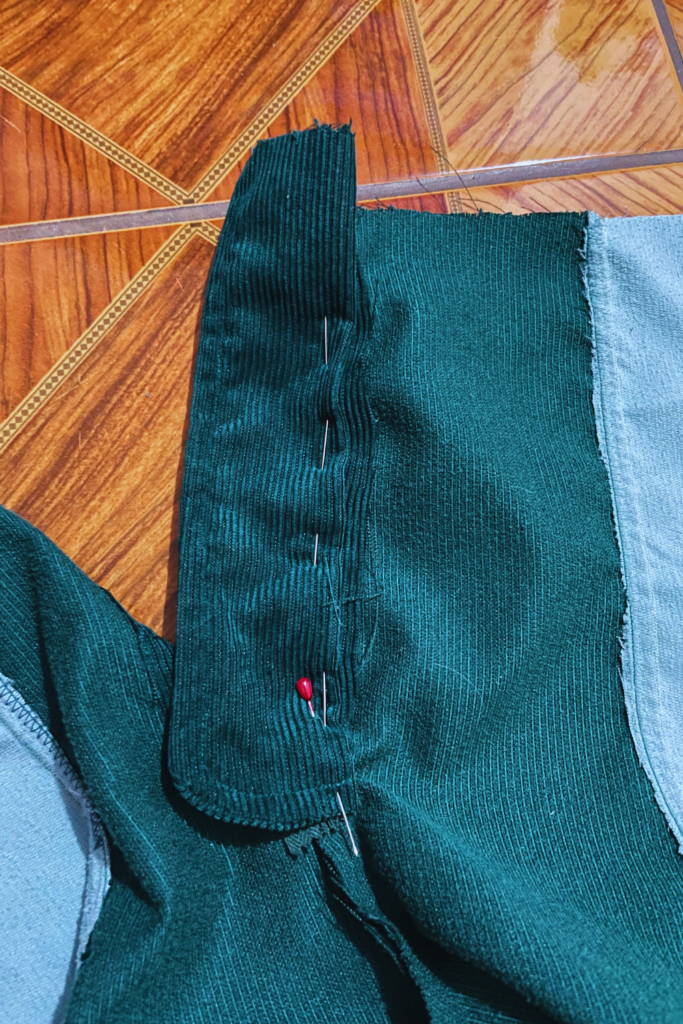
Finally, grab the little zipper flap that we created earlier for inside the pants. Pin the straight side to the left zipper piece, as shown above, and sew it in place.
With that, your zipper is done and you can proceed with sewing your statement pants. If I remember correctly your next step is something like placing the back pant and front pants good sides facing and sewing along the inner and outer leg seams.
This is the point where you will also want to try the pants on and take out any extra fabric. Remember my tip from earlier as well, sew the inner leg seams and all detailed stitches first, before sewing the outer leg seams closed.
The Fine Details
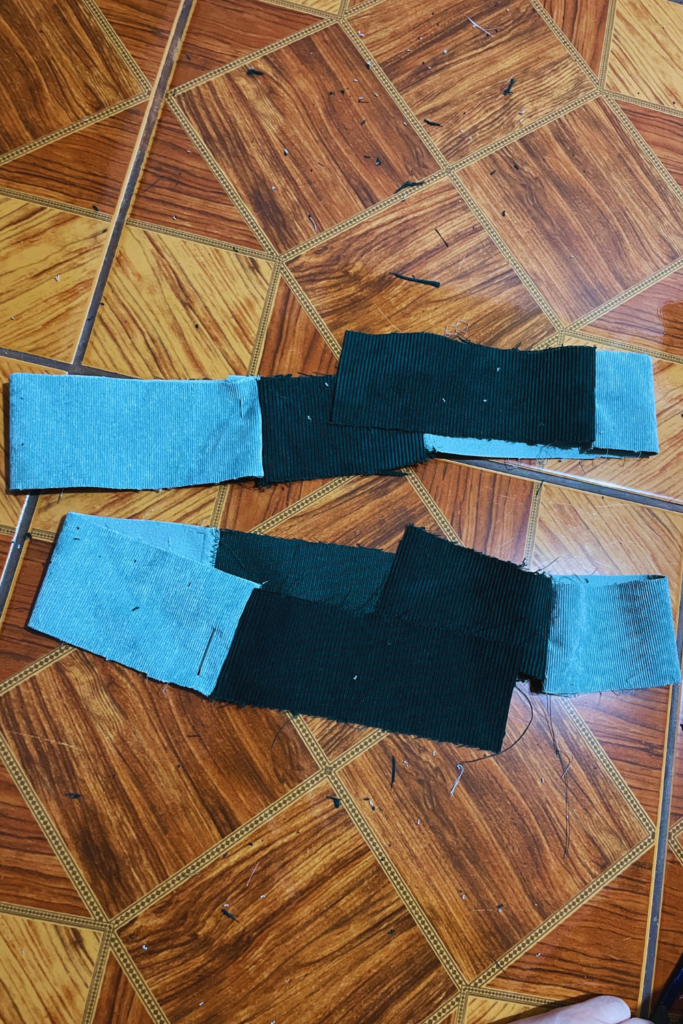
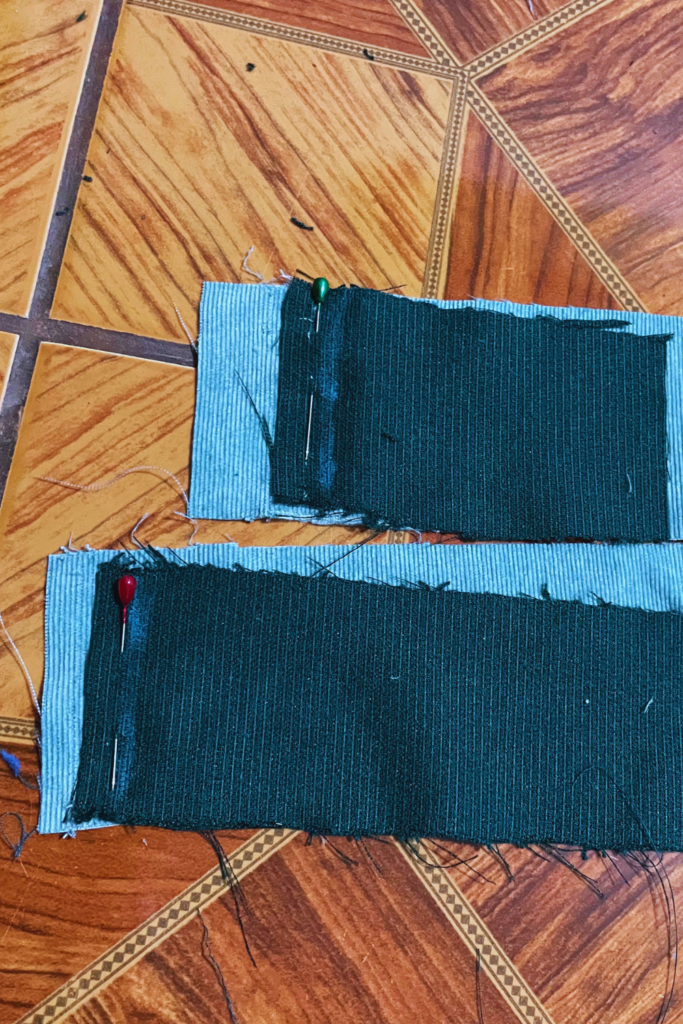
The key to making your statement pants look professional is in the fine details. We need to make sure we finish all raw edges and especially, line up all the seams perfectly!
Because this pant has two different colors and every detail is on front and center display, you really want to take the time to line it all up perfectly.
Personally, I seam-ripped my waistband pieces over eight times to make sure they were perfect. It took me four days to get it right. I almost got lazy and gave up with the millimeter difference at one point, but I knew seam ripping it just one more time would be worth it if I could get it right.
If you need to seam rip something that only needs to move over a hair, don’t seam rip the whole thing. Seam rip only the section around the spot you need to move over, up to 1cm on either side of the spot you’re trying to fix. This should give you enough fabric to fix the spot and move the seam over without undoing the whole waistband.
Finally, you only need to install your button. If you need a full tutorial on installing a stud button, check out this post.
With that – we’re finished!
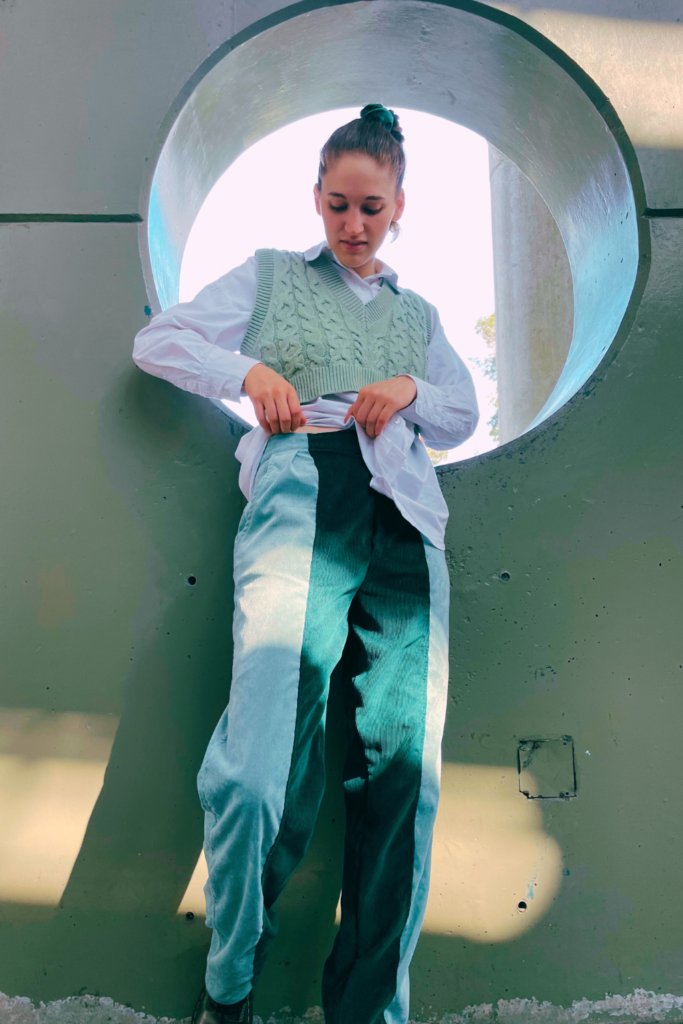
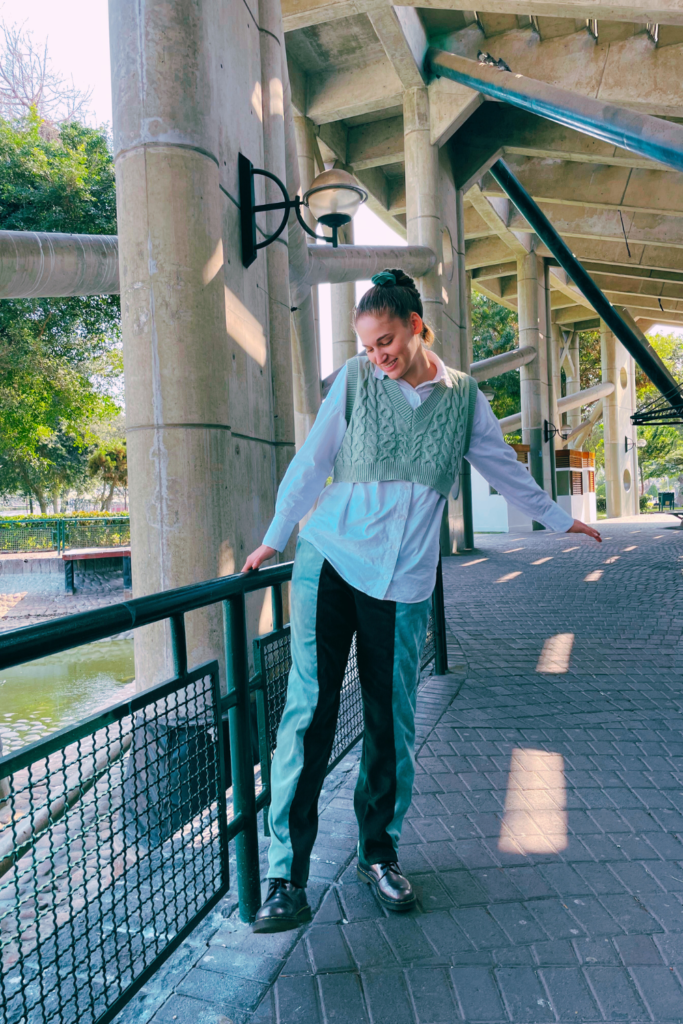
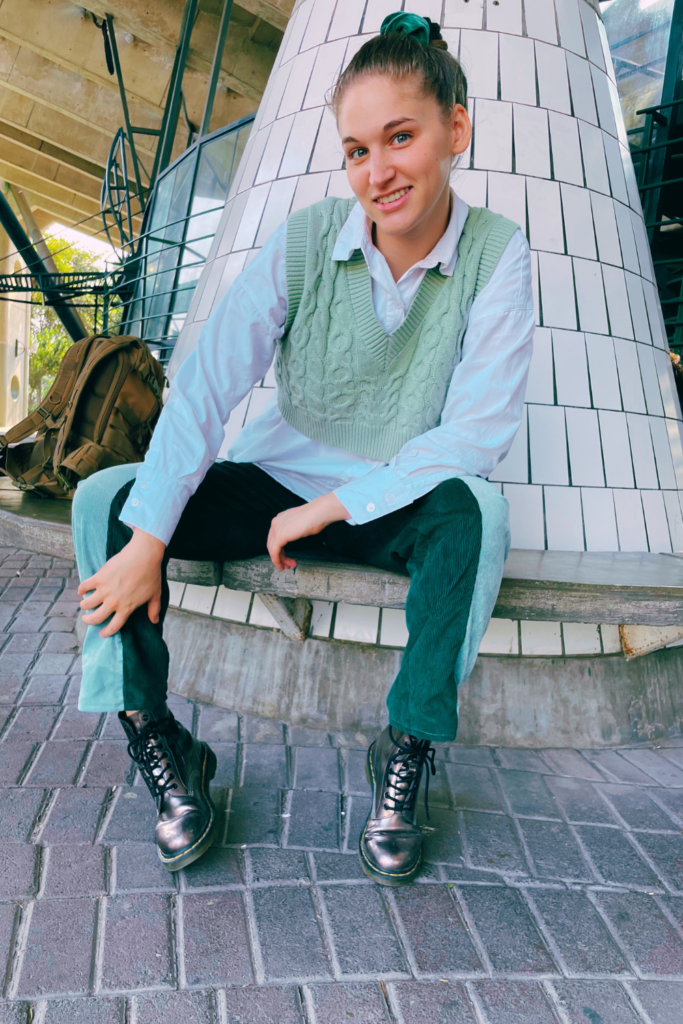
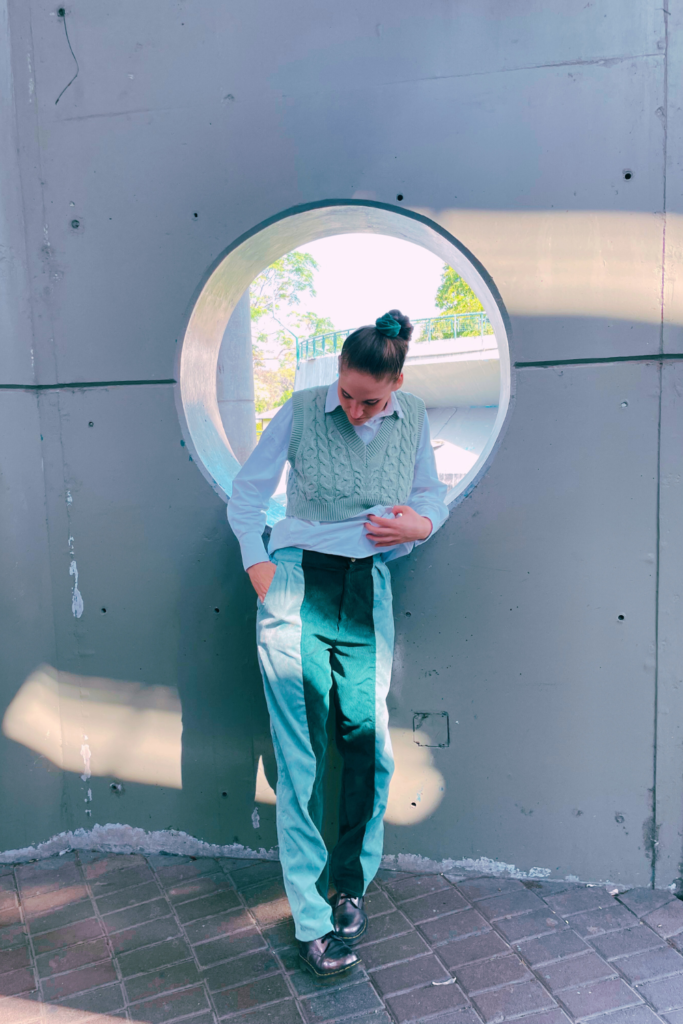
I will have two styling posts for you here (Part 1 and Part 2)! I had so much fun putting together outfit ideas, I have plenty of outfits to share!
If you decide to give this project a go, tag me on Instagram @doorsandfloorsblog and use the hashtags #SewingCat and #DoorsAndFloorsBlog and #UseUpYourStashChallenge so I can see what you make! I hope you enjoyed this statement pants post and you’ll give this project a go! Let me know in the comments what you think!
Explore other recent posts:
- Remote Work Life in Perú: Introducing The Chickens
- How To Make A Kids Scrap Fabric Top: Design #3
- The Truth About Working Remotely In Perú
- How To Make An Eyelet Top Out Of Scrap Fabrics: Design #2
- 10 Interesting Restaurant Culture Shocks From Eating Out In Perú
Find us on social media!
P.S. Looking for a fun activity you can do with a friend while working on tedious crafty tasks, download our free trivia here.
Playing trivia is a great way to keep your mind active and have fun with your crafty friends and family while busting out those seam ripping, crocheting, and other time-consuming, but necessary, crafty tasks.
