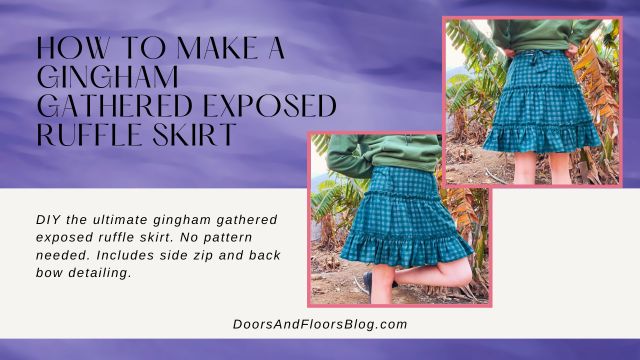
Today – let’s make a gathered exposed ruffle skirt!
Gingham skirts seem to be all the rage these days…or at least on the side of the internet that I’m scrolling through. If you too are seeing these lovely skirts popping up all over your feed, but want to add a little twist to the usual design – you’ve come to the right place!
Today we’re making the usual gingham gathered skirt with some tweaks by adding exposed ruffles and a bow at the waistband. Ready to find out how?
Spoiler alert: It’s just a bunch of rectangles.
I’m so excited for you to see the final result and make one for yourself. So let’s get started on this gathered exposed ruffle skirt!
This post may include affiliate links.
Please read my disclaimer page for more info.
*As an Amazon Associate, I earn from qualifying purchases.*
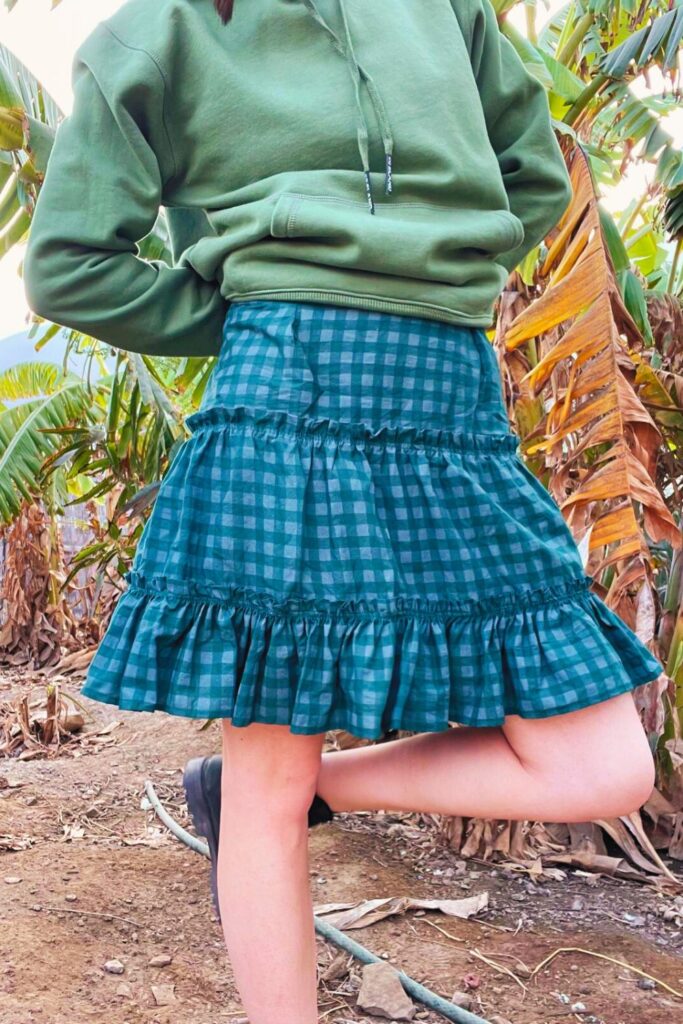
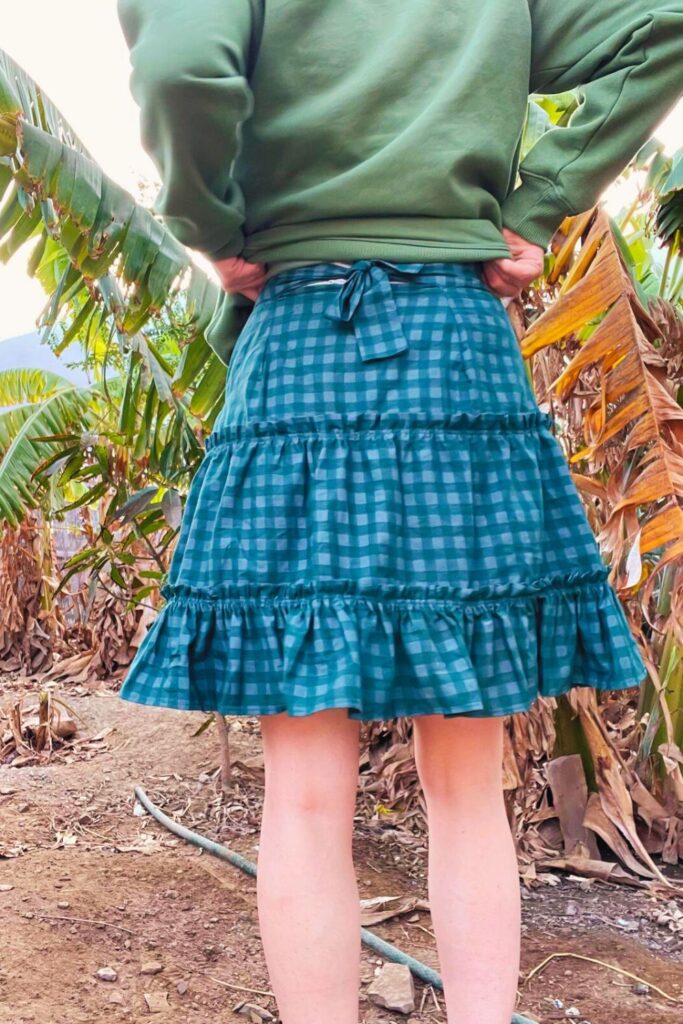
Approximate time put into this project: 3 days, with 3-4 hours put in each day (the skirt is not hard to sew, but gathering the layers is quite time-consuming)
What You’ll Need:
- Fabric, about 2-3 meters depending on the size and length of your skirt
- For a gathered skirt, you typically want at least three times your waist measurement
- Sewing machine
- With zipper foot and straight stitch foot
- Matching thread
- Sewing pins – seriously, you’ll need a lot of them for this project!
- Scissors
- Fabric tape measure
- A ruler
- Fabric chalk
- Iron and ironing board
- Zipper
- About 7″ – 8″ (18cm – 20cm) long
Disclaimer: I am trying to teach myself the Metric System. I will try to always include both measurements in my tutorials, i.e. centimeters and inches, meters, and yards. I have been using them interchangeably in my everyday sewing life lately, sorry if I switch between the two too often or forget to include them both. Thanks for understanding!
Cutting Your Pattern Pieces
To cut your pattern pieces for this gathered exposed ruffle skirt you’ll need the following rectangles. Feel free to cut longer/taller pieces if you have the material for it!
- For the waistband, cut one piece of fabric 4″ (10cm) tall by your waist measurement + extra length for a bow in the back. I cut one strip of fabric the width of my fabric, which was 60″ (153cm). I recommend cutting yours way longer for extra bow volume.
- Tier 1: Measure the circumference of your waist/high hip. Divide this number by two. Add 3″ (7.50cm) to the total width, that’s 1″ (3cm) each for seam allowance, zipper, and darts. Measure how long you’d like this piece to be, then add an extra 1″ (3cm) to the length in addition to your seam allowance. Cut two rectangles.
- Optionally: You can fold both pieces in half, along the top of the open end make a mark .50″ (1cm) in, then measure halfway down your piece, create a slightly curved edge to the mark, and trim off the excess. This will help the rectangle to hold your shape a little better.
- Tier 2: Cut two rectangles your desired height + 2″ (5cm), mine was 12″ (30.50cm). For the length, you’ll ideally want each piece to be twice as long as the tier before it.
- Tier 3: Cut two rectangles your desired height + 2″ (5cm), mine was 10″ (25cm). For the length, you’ll ideally want each piece to be twice as long as the tier before it.
You can continue to add as many tiers as you want following this same formula.
Sewing Tier #1
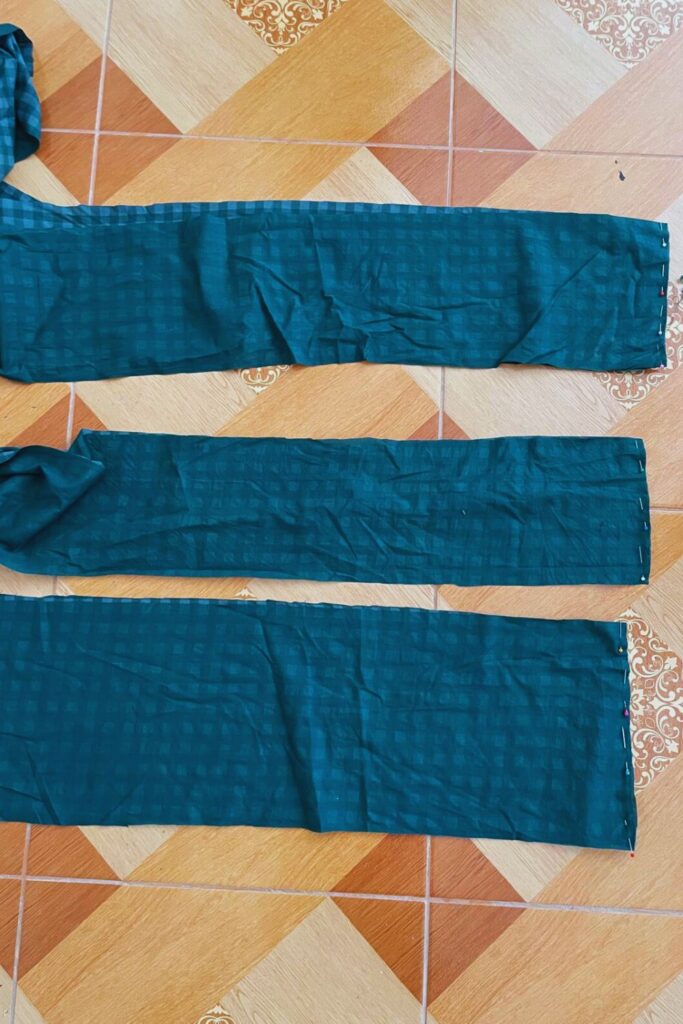
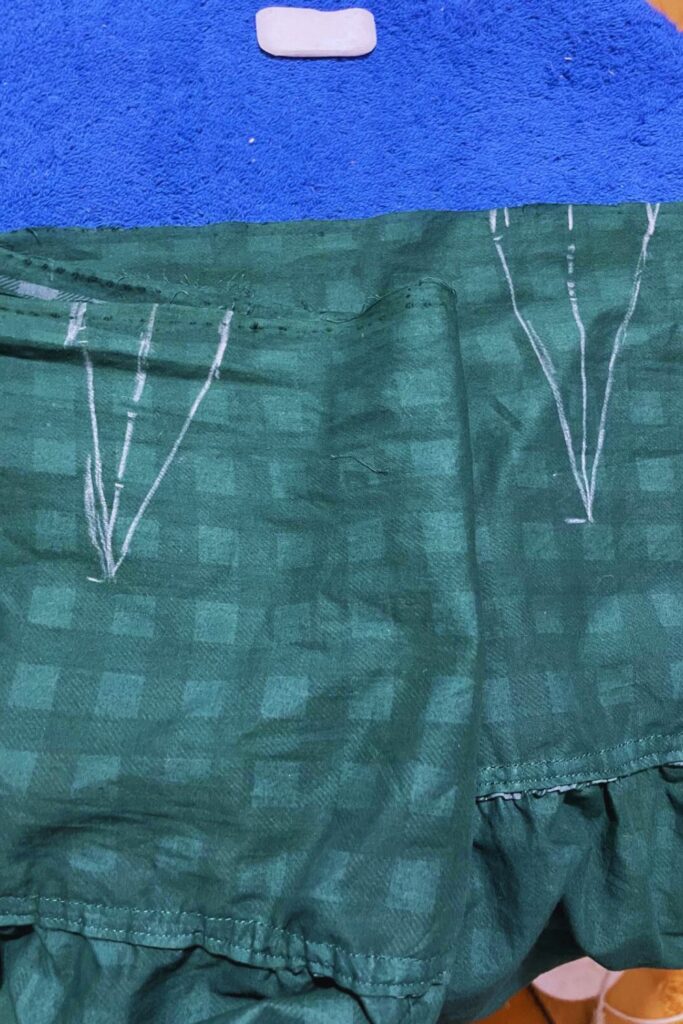
Left Picture:
Start by pinning the two pieces for your first tier together, good sides facing, and sewing along one side only. Finish the raw edge with a zig-zag stitch or by overlocking.
To save time for later, you can also pin each of the other pieces together for tier two and three. Sewing along one side only and finishing the raw edges. Put these pieces aside for later.
Right Picture:
Next, let’s sew the darts. To mark them on the inside of your skirt, measure yourself where this piece will sit. For me, this will sit at my high hip. Taking tier one, make a mark on each raw edge (about .50″ (1cm)) to account for the zipper seam allowance. Now measure from one mark to the other, and subtract your waist/high hip measurement from the length.
Here’s an example of how you’ll want to do the math for your darts:
- Waist/high hip: 30″ (76cm)
- Length of tier one between the marks: 34″ (86.50cm)
- Tier one – waist/high hip = 4″ (10cm) ÷ 4 (the number of darts we’ll want to add) = 1″
The number you get will need to be taken out of the front and back of the skirt.
Lay your first tier out flat, working with half at a time, measure your piece between the seam in the middle and the mark you made for zipper allowance. Divide this measurement by four. With that measurement, make one mark in from each side at that measurement.
E.g. If the total width of half of tier one is 17″ (43cm) ÷ 4 = 4.25″ (11cm), from the center seam, make a mark at 4.25″ (11cm), doing the same on the other side, in from the zipper seam allowance. Repeat this on the other side of the seam.
Please tell me if this is too much info and you get it, and I’m being annoying.
Taking the measurement you got for your darts earlier, divide it by two. Then make a mark on either side of the first mark. So the width between the two should create the total width needed for one dart.
You’ll want to make your darts longer in the back than in the front. I made the darts on the front 3″ (8cm deep), while the ones on the back are 4.25″ (11cm) deep. Use your ruler to connect the two sides to the point in the middle.
You’ll need to create four darts this same way.
I find this channel on YouTube helpful for pattern making if you need more help determining the proper length for your darts.
Because I totally don’t know if my dart lengths were proper here, I just winged it…
Pin and sew your darts. Press with your iron. Optionally top stitch your darts to hold it in place.
Sewing & Attaching Tiers 1, 2 & 3
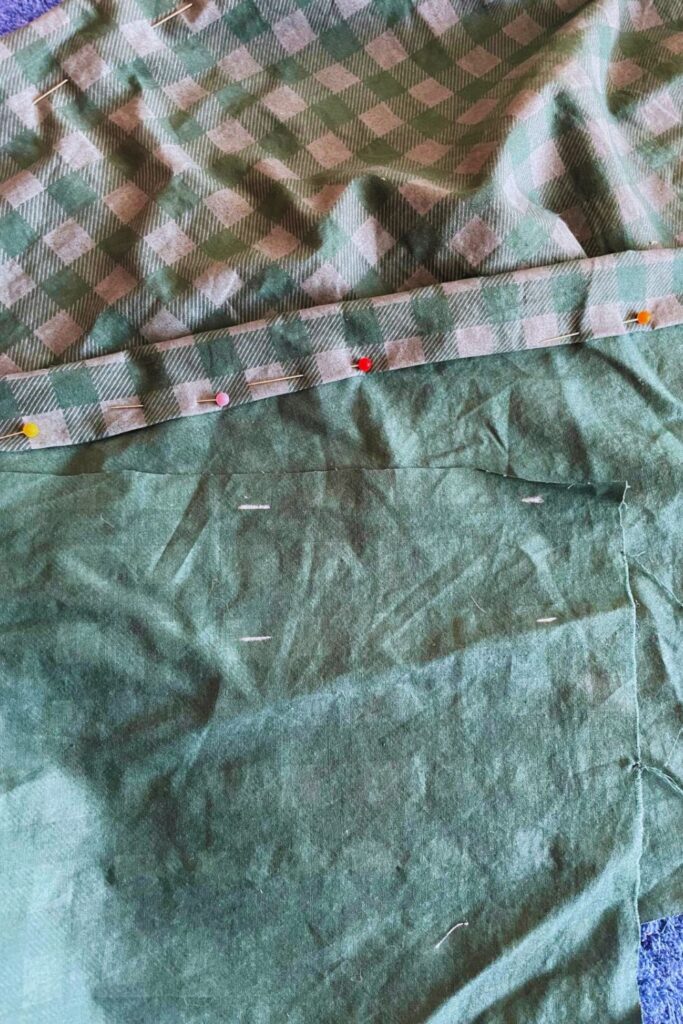
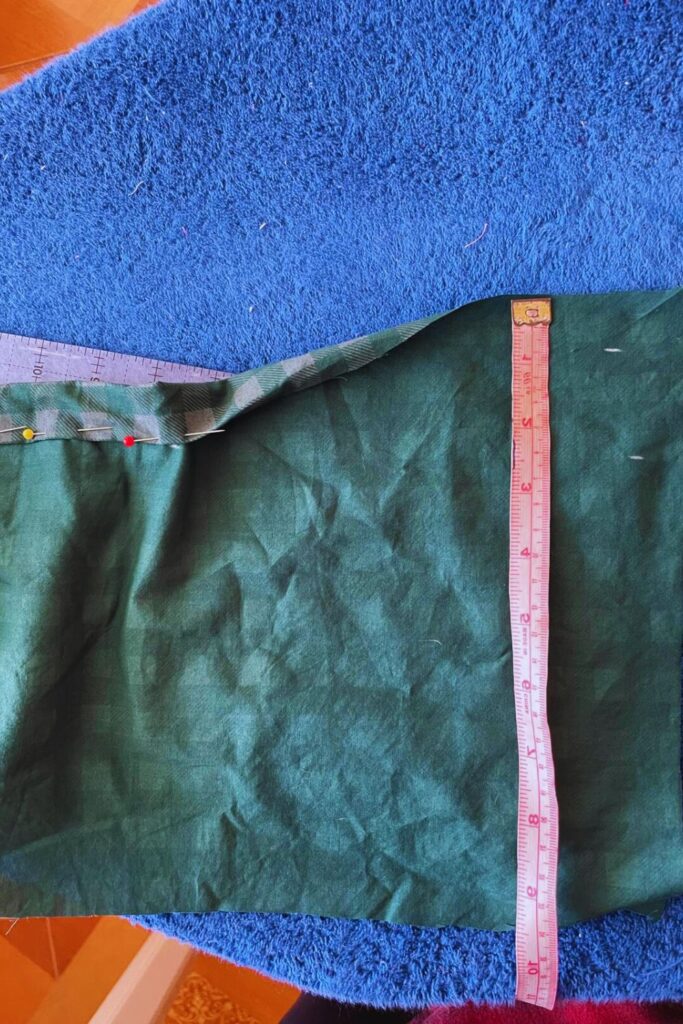
Grabbing the pieces you set aside earlier, lay tiers two and three out flat, then grab your ruler and sewing chalk. From the top edge, make a mark at .75″ (2cm) down and another mark at 2.25″ (6cm) down. Repeat this all the way across the top edge. Repeat this same step on tier three.
To pin in place, fold the raw edge down to the .75″ (2cm) mark, which creates a .50″ (1 cm) fold. Then fold this piece down to the 2.25″ (6cm) mark, hiding the raw edge inside. Pin it in place and work your way up the rest of the strip of fabric. Repeat the same folding and pinning technique on your other tier.
When you’re ready to sew, set your machine to the loosest stitch and sew a gathering stitch along the inner folded edge.
Now, pull up a seat, put on your favorite TV show, and start gathering. You’re going to be there for a while. This took me a couple of hours.
You will want to gather tier two to the same width as tier one. Gather tier three to the width of tier two.
When you’re gathering, I recommend gathering one end to the center seam, checking that you’re matching the width of the proper tier that goes before it so you don’t do any unnecessary gathering. Then gather the other side to match, stopping at the center seam.
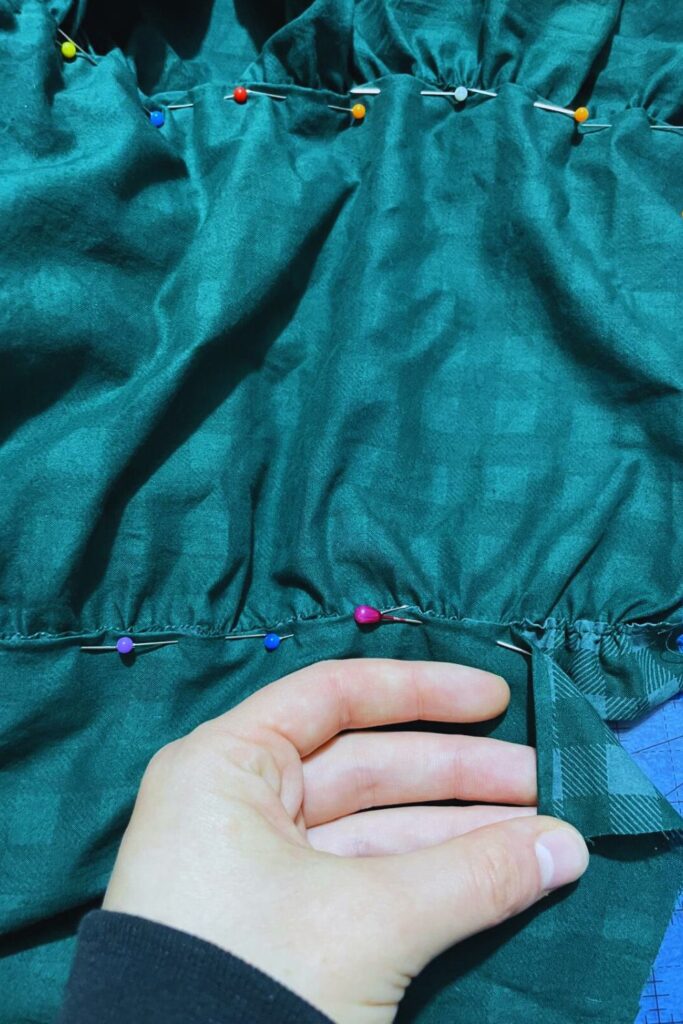
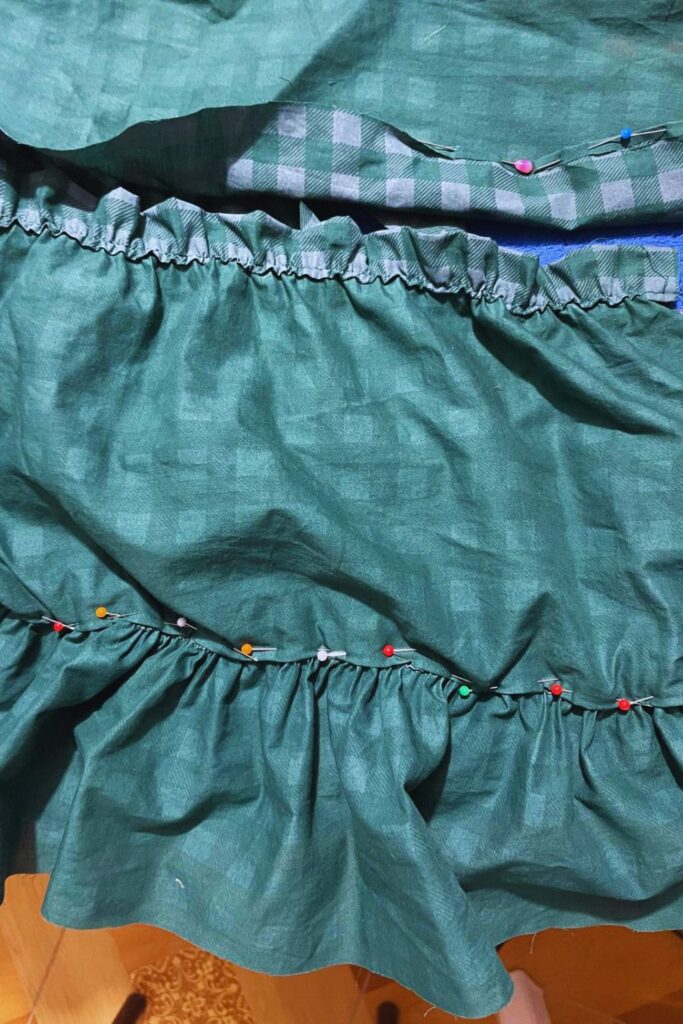
To attach the tiers together grab tier one and tier two. Fold the non-gathered edge toward the good side of the fabric by .50cm (1cm), as shown in the left picture. Then pin the folded edge to the bottom edge of the gathered ruffle. Work your way all along the skirt piece till everything is carefully pinned in place.
Note: If you have an overlocker you don’t need to do this tedious, ridiculous step of folding. You can simply overlock the raw edge and pin the ruffle directly on top of the previous piece and topsitch.
I tested this with my zig-zag stitch and didn’t like the result because my fabric is thin.
Carefully sew as close to the folded edge as you can get. Flip your skirt piece over to the right side and make sure you didn’t catch any ruffles in your stitch. Then topstitch a second row of stitches .50″ (1cm) (or less) from the first. I did this by moving my needle to the side and following the first row of stitches with my sewing foot.
Then repeat these same steps to attach tier three to tier two.
Attaching The Zipper & Waistband
Before you attach your zipper, iron your waistband in half first, wrong sides facing. I like to iron the outer edges in .50″ (1cm) as well. Fold your waistband in half to find the center and mark it with a sewing pin. Now fold your skirt in half and mark the center front and center back with a sewing pin.
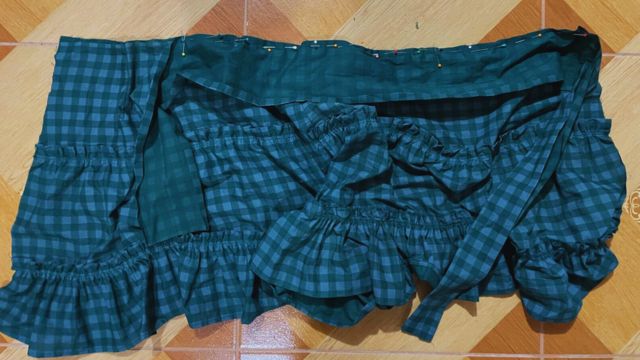
Pin the waistband to the top of the skirt, good sides facing, starting at the center front. When you get to the back of the skirt, grab your fabric chalk and mark the center back, then make a mark on the inside of your waistband 3.5″ (9cm) over from the mark at the center back. Pin only to the second mark, not the center back.
For the other side of the waistband, pin until you meet the opening of the skirt where the zipper is going to go. Sew the waistband in place then cut off the extra length on the end of the waistband that is divided by the zipper spot. Pin the excess you cut off to the other side of the zipper opening. When you get to the center back, use your fabric chalk to mark the inside of the waistband, then measure 3.5″ (9cm) over like you did on the other side. Sew this in place only to the second mark you made, not the center back.
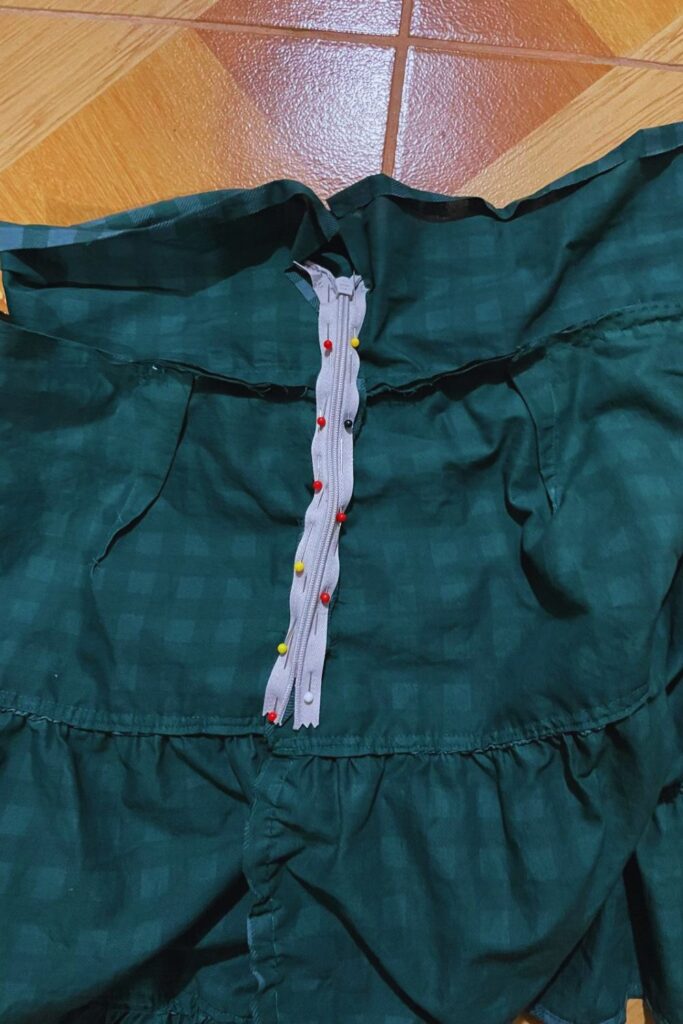
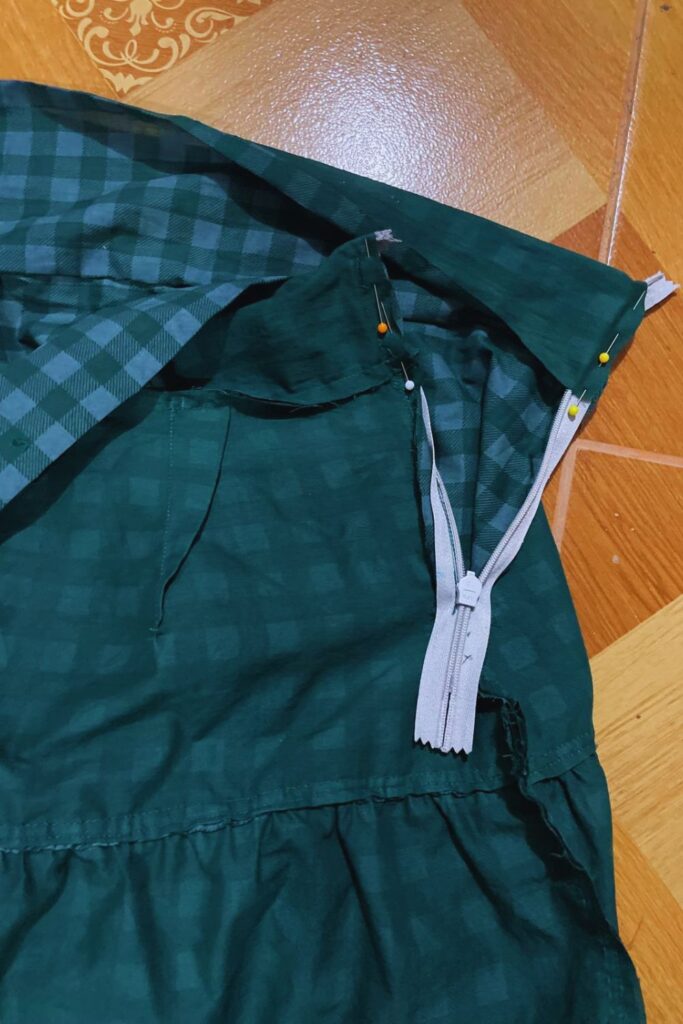
To attach your zipper fold your skirt in half, good sides facing, and sew a basting stitch. Pin your zipper in place, lining the clear stopper up with the center fold of your waistband, then sew. If you need a more in-depth tutorial on sewing an invisible zipper, please check out this post here, where I go in-depth on the whole process.
After the zipper is in place, create a new stitch over the basting stitch, if you didn’t remove it, to secure the bottom half of the side of the skirt.
Right Picture:
Next, fold your waistband over where the zipper opens, good sides facing and pin the extra zipper tab out of the way. Sew a straight stitch, leaving .50″ (1cm) unsewn so you can tuck it under later when sewing the waistband.
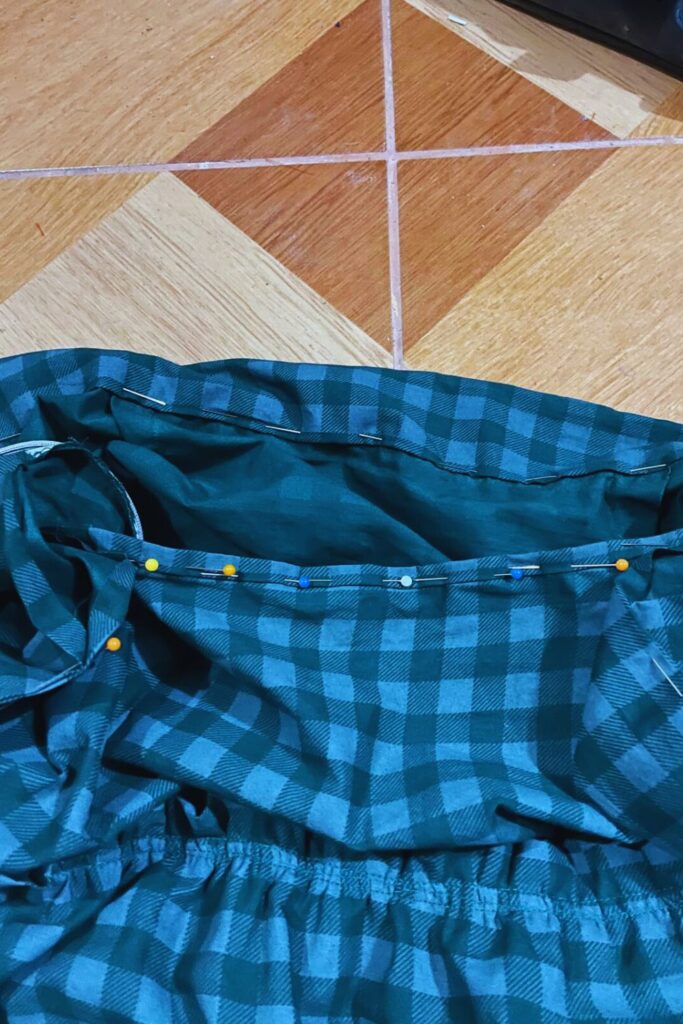
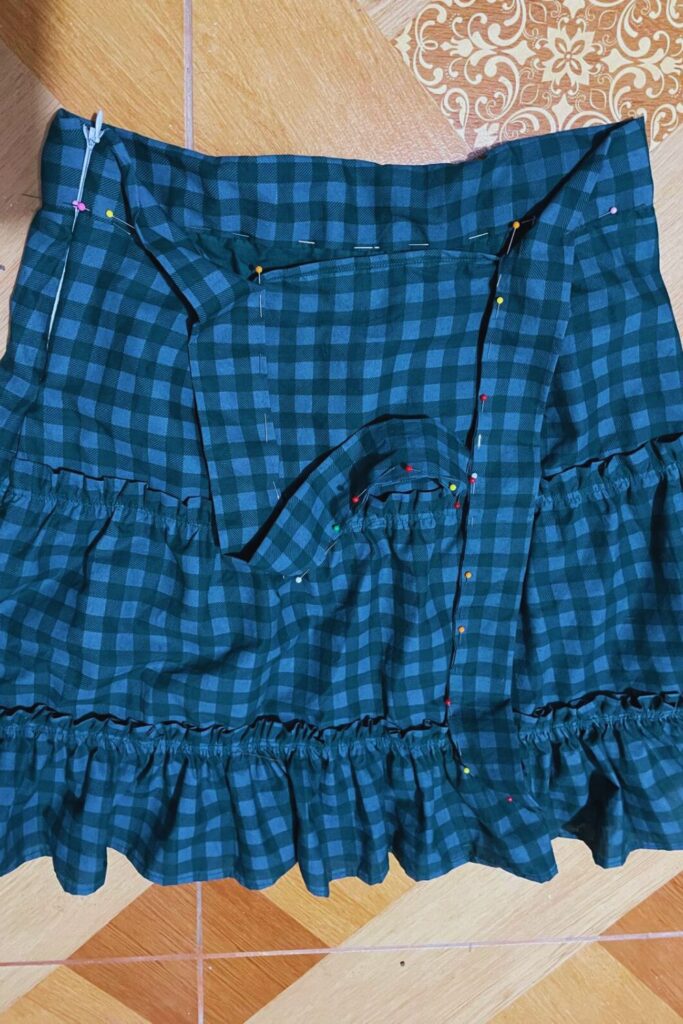
Turn the waistband right sides out and begin to tuck and pin the raw edge to the inside all the way to the end of the ties.
To cover up the raw edge at the gap we left open, I created a quick, small piece of bias tape out of leftover fabric and sewed it in place before I sewed the ties. Make sure the piece is long enough to hide the raw edges inside the waistband.
Now top stitch, or stitch in the ditch, from one end of the ties, around the waist, and to the other end of the ties.
Finally, to finish the gathered exposed ruffle skirt, create a double-rolled hem along the bottom of your skirt. Pin and sew to finish the skirt.
Finished Results
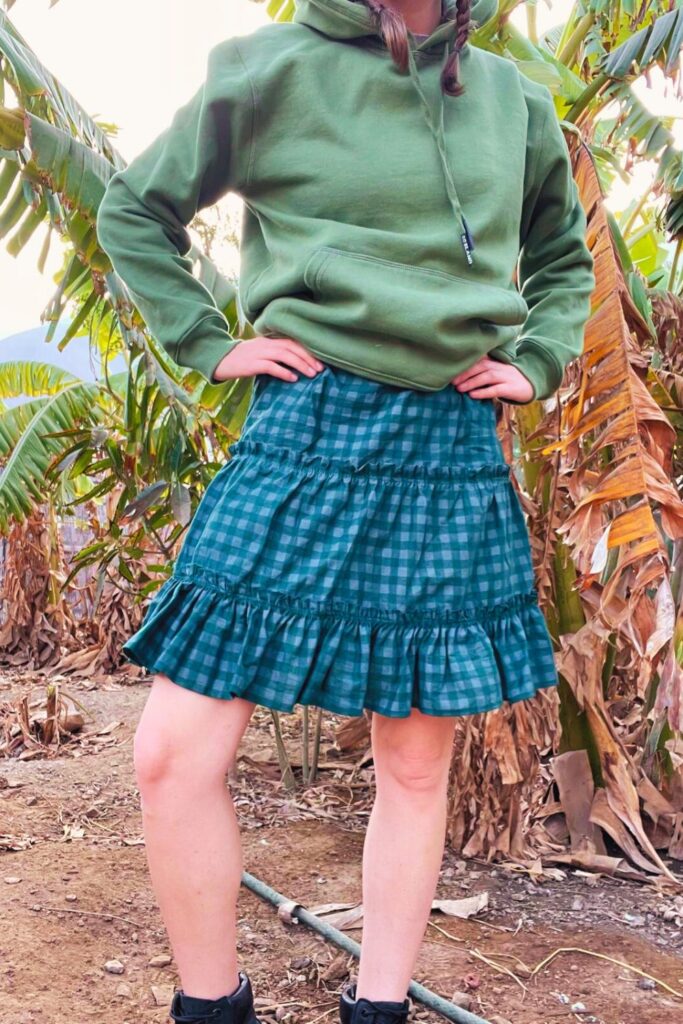
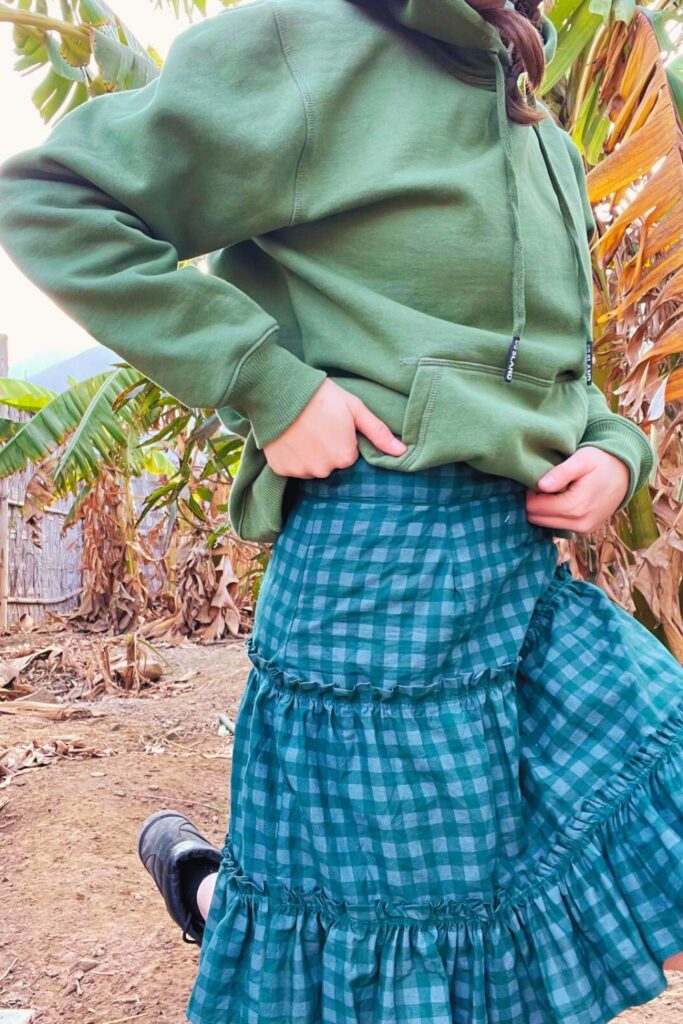
My only regret with this skirt, is I wish I had more fabric to make the bow at the back longer. Oh, and that I took these pictures outside in mosquito season.
I’m definitely going to make another one of these skirts sometime. Perhaps a little longer, I’m thinking below the knee. Something in a solid color – possibly black, oooh, and maybe satin! What do you think?
I really hope you enjoyed this tutorial and give the gathered exposed ruffle skirt a go! Let me know in the comments what you think and whether you’d choose gingham or another fabric.
If you make this project, tag/DM me on Instagram @doorsandfloorsblog so I can see what you make! Remember to use the hashtag #DoorsAndFloorsBlog
Explore other recent posts:
- Come See My Peruvian Textiles: Including Fabrics, Yarn and Ribbons
- How I Made A Farm Rio Inspired Matching Set
- Making Free People Inspired Cargo Pants From A Simplicity Pattern
- Tips For Crafting And Shopping More Sustainably In The New Year
- A Last Minute Scrap Fabric Project To Customize Gifts: How To Make Gift Tags
Find us on social media!
P.S. Looking for a fun activity you can do with a friend while working on tedious crafty tasks, download our free trivia here.
Playing trivia is a great way to keep your mind active and have fun with your crafty friends and family while busting out those seam ripping, crocheting, and other time-consuming, but necessary, crafty tasks.



Hey people!!!!!
Good mood and good luck to everyone!!!!!