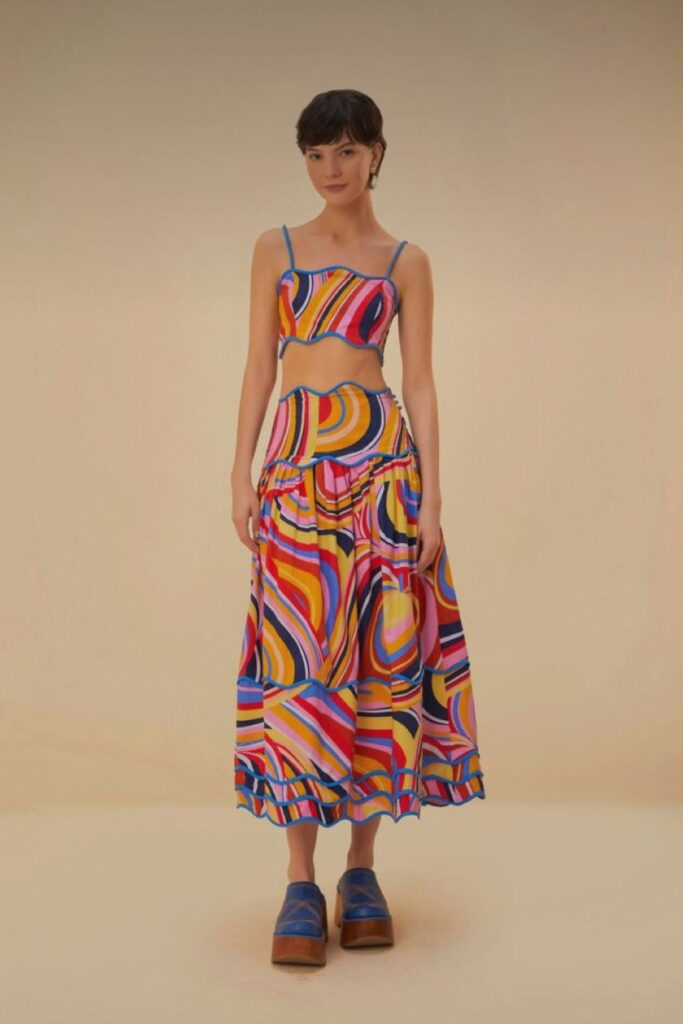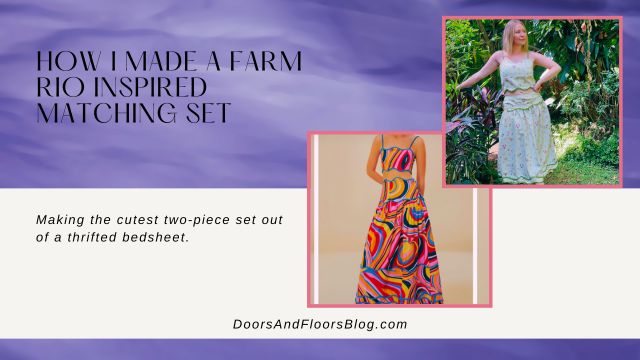
I am so excited to finally bring this project to you. A Farm Rio inspired matching set!
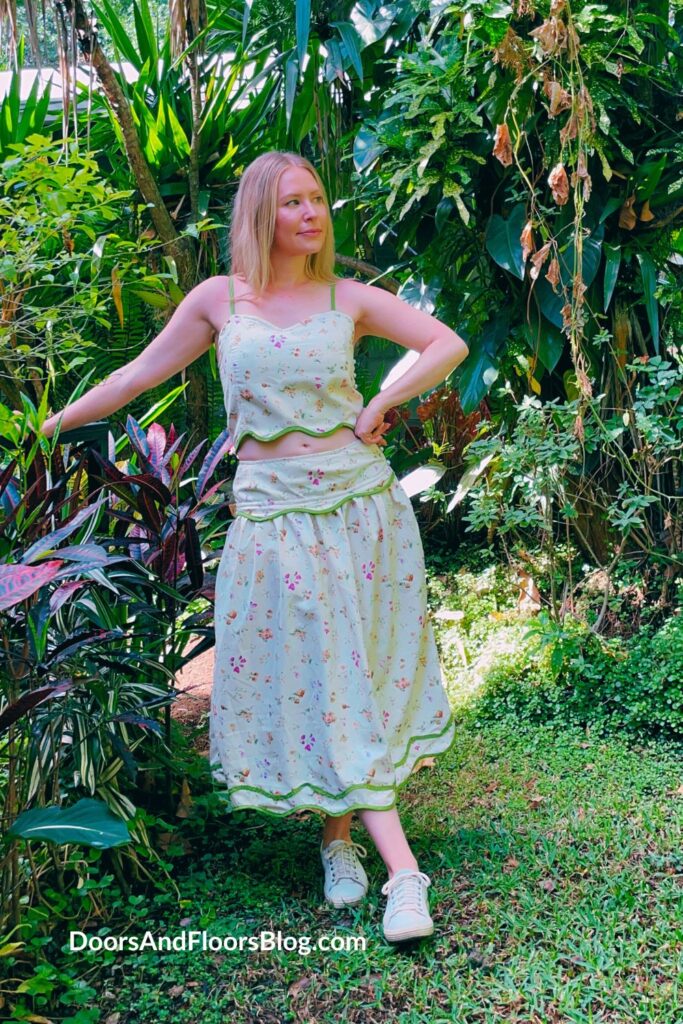
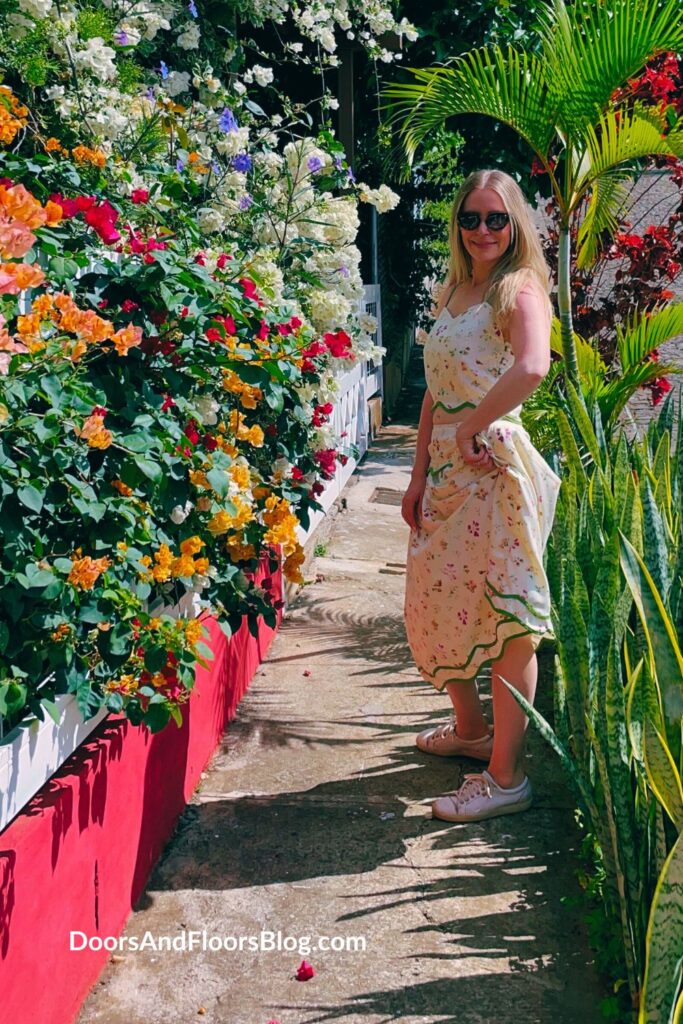
In an attempt to get the best of both worlds (A gorgeous Farm Rio set and me-made fashion. Made from a thrifted bedsheet!), we’re making my sister a two-piece vacation set as her belated Christmas present.
Now what are you waiting for? Let’s get into all the juicy details!
This post may include affiliate links.
Please read my disclaimer page for more info.
*As an Amazon Associate, I earn from qualifying purchases.*
Approximate time put into this project: 4 weeks, with 2-4 hours put into the project every other day.
Disclaimer: I am trying to teach myself the Metric System. I will try to always include both measurements in my tutorials, i.e. centimeters and inches, meters, and yards. I have been using them interchangeably in my everyday sewing life lately, sorry if I switch between the two too often or forget to include them both. Thanks for understanding!
Pattern Making
To make this Farm Rio inspired matching set I spent a lot of time studying pictures so I could match as many details as possible. I’ll list a few of the details below, but if you’re interested in making this set for yourself, I would really encourage you to check out the pattern-making video below.
- Pattern I used for the top – I intentionally made the top longer than the inspo pic.
- I did not use a pattern for the skirt, I made it up. Briefly, if you want to recreate it:
- Determine how long you want the entire skirt to be, then subtract whatever length you want the waist portion to be, from that total.
- Note, the waist portion needs to be 1″ (3cm) longer than your desired length to add the wavy row at the bottom.
- The bottom half of the skirt needs to be 1″ (3cm) longer than your desired length because it will be sewn into the waistband.
- For the waistband, create a rectangle the length of half your high hip measurement (whatever the widest part of the waistband will be). Then take the measurement of the smallest place the waistband will be. Subtract the smallest number from the biggest number to determine how much you need to take out via darts. Divide that number by four and mark out two darts along the top edge of your rectangle. Remember to factor in the extra fabric needed for the side zipper and seam allowance.
- For the bottom half of the skirt, take your full hip width and cut two rectangles this width by the previously determined length. Optionally, you can cut these wider for a fuller skirt.
- I cut pockets out using a pattern from a random pants pattern I had lying around.
- Determine how long you want the entire skirt to be, then subtract whatever length you want the waist portion to be, from that total.
- Fabric I used
- This project uses a LOT of bias tape. I recommend buying a big roll from the store or picking up a bias tape maker like this before beginning the project.
Watch the video below for a full overview of my pattern plans!
Sewing The Top
Watch this video for a full overview of the sewing process for the top.
Since the main base of this top used a sewing pattern I have already used on numerous occasions, sewing everything together was relatively easy and came together quickly.
Some features included in this top:
- Side buttons/closure
- Adjustable straps – I followed this tutorial
- Sweetheart neckline
- Bottom wavy hem
Sewing The Skirt
Watch the full sewing process of the skirt below.
Next up for this Farm Rio inspired matching set – the skirt. Good news is, it was actually pretty simple to bring together. Aside from a minor bias tape crisis, I found this project quite pleasant to sew.
Important key features:
- Pockets!!
- Side zip – Super important, to achieve this, I followed this tutorial so we didn’t compromise on the pocket sitch.
- Also as a bonus to the pockets, I added some snaps (like these) to ensure nothing would fall out of the pockets.
- Wavy rows – unfortunately, I ran out of bias tape and couldn’t do as many rows as the original design called for. But the method for sewing them is all shown in the video above if you want to add more rows than I was able to.
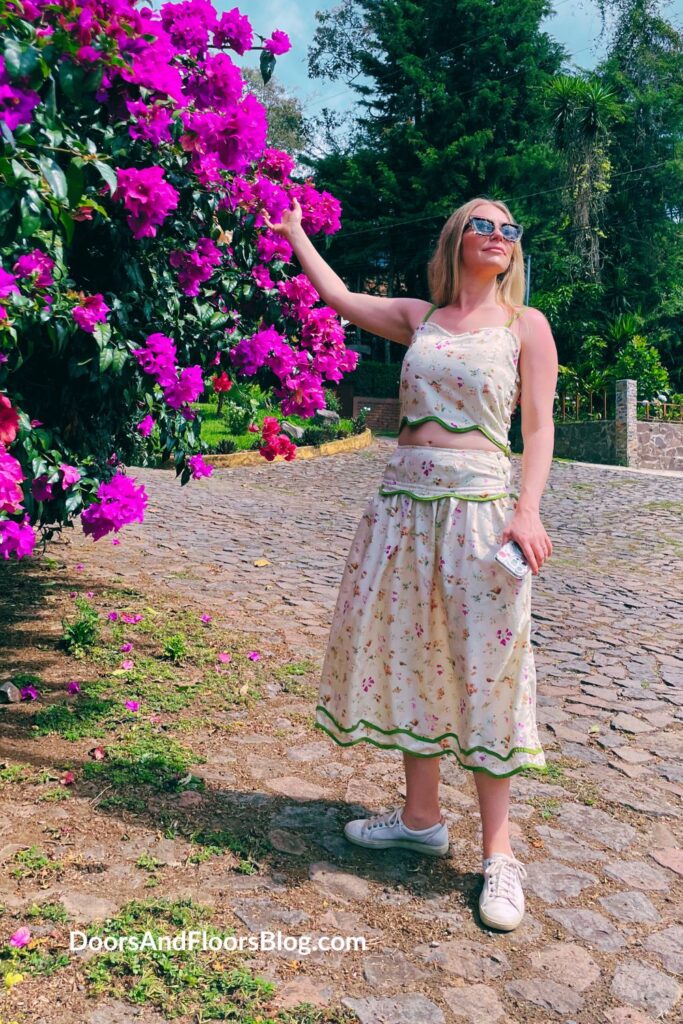
Finished Results
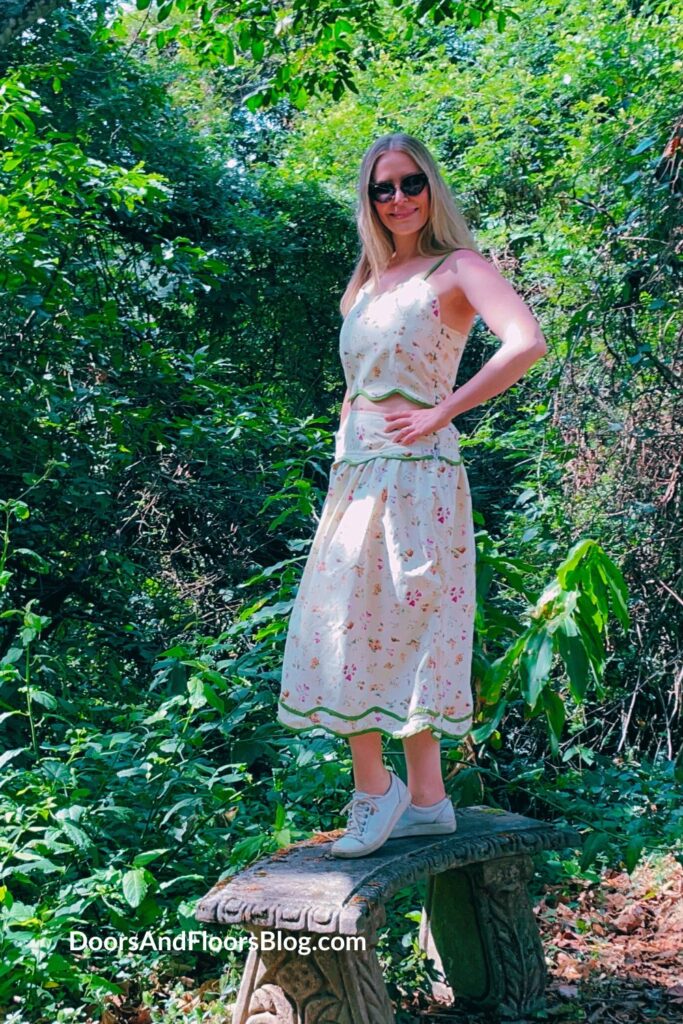
P.S. If you liked this – SHARE and PIN THIS POST!
I am dying to hear your thoughts on this project. Did you like it? Would you make your own?
If you make this project, tag and DM me on Instagram @doorsandfloorsblog so I can see what you make! Remember to use the hashtag #DoorsAndFloorsBlog
Explore other recent posts:
- Come See My Peruvian Textiles: Including Fabrics, Yarn and Ribbons
- How I Made A Farm Rio Inspired Matching Set
- Making Free People Inspired Cargo Pants From A Simplicity Pattern
- Tips For Crafting And Shopping More Sustainably In The New Year
- A Last Minute Scrap Fabric Project To Customize Gifts: How To Make Gift Tags
Find us on social media!
P.S. Looking for a fun activity you can do with a friend while working on tedious crafty tasks, download our free trivia here.
Playing trivia is a great way to keep your mind active and have fun with your crafty friends and family while busting out those seam ripping, crocheting, and other time-consuming, but necessary, crafty tasks.
