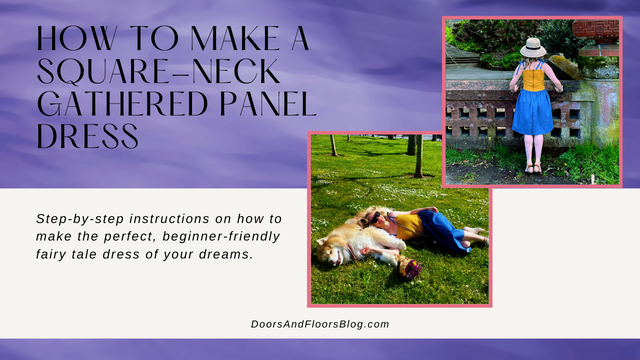
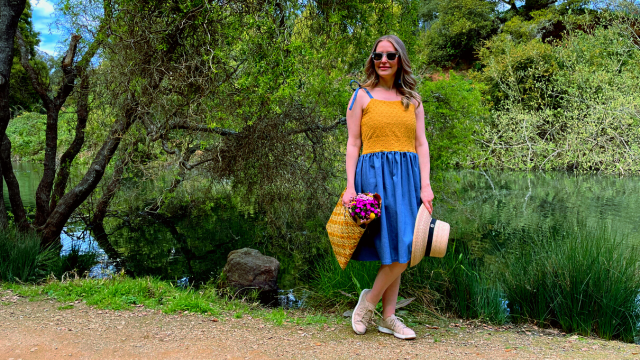
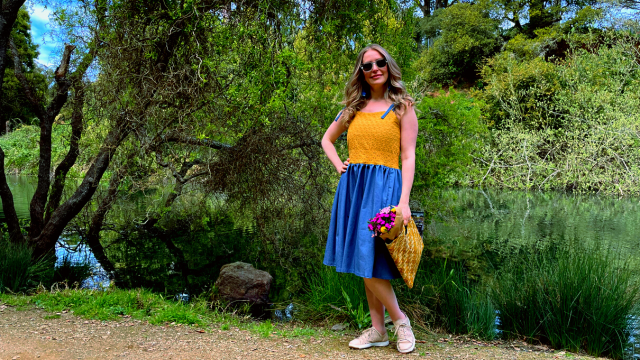
I made this square-neck gathered dress for my sister. It was designed in her mind, and executed in mine.

This was a fun item to sew that was honestly quite peaceful and therapeutic to make. It is super easy and beginner friendly. With a few hours of sewing and some friends that are great at taking pictures, you too can look like you live in a fairy tale world.
I forgot to tell you the best part about making this gathered dress. There’s no pattern needed!
Yep, you read that right. No pattern needed.
All you need are some measurements and a bunch of rectangles.
This post may include affiliate links.
Please read my disclaimer page for more info.
*As an Amazon Associate, I earn from qualifying purchases.*
Let’s get started!
Approximate time to completion: 4 days, 6 – 8 Hours total
What you’ll need:
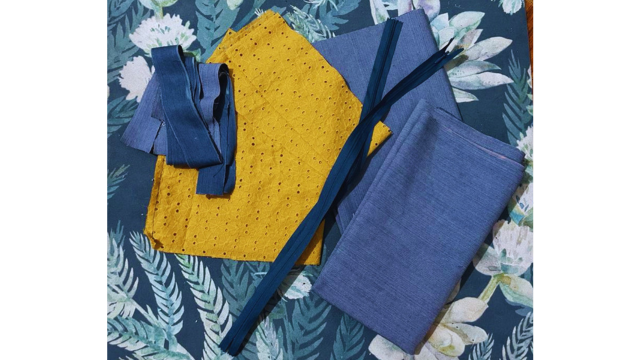
- Fabric, two colors optional, 2-3 meters (2.25 – 3.25 yards approx.) depending on the desired length and gather of your dress
- Matching thread
- An invisible zipper
- Sewing machine
- Zipper foot
- Straight stitch foot
- Scissors
- Fabric chalk
- Sewing pins
- An iron and ironing board
- A safety pin or long paintbrush for turning your straps right side out
- Fabric tape measure
Disclaimer: I am trying to teach myself the Metric System, so I will always try to include both measurements in my tutorials, i.e. centimeters and inches, meters, and yards. Though in my everyday sewing life lately, I have been using them rather interchangeably, I apologize if I miss including both or switch between the two too often.
Take Your Measurements
Before we can jump in and start cutting fabric, we’re going to need some measurements, and I highly recommend you write these down because we’ll be referring back to them often.
For reference, these are the measurements I followed for my sister.
- Bust: 34″ (86.5cm)
- Waist: 27″ (68.5cm)
- Hip: 34.50″ (87.50cm)
- The desired length from your waist to where you want the dress to end: 24″ (61cm)
- In addition take your measurement from above your breasts, where you want the top of your dress to be, to your waist, or where you want the skirt to start. Our measurement was 9″ (23cm).
Building Your “Pattern” And Cutting Pieces
The Top Pieces
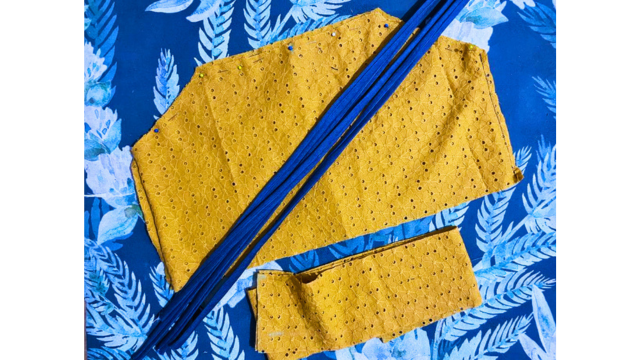
To create this gathered dress, these are the pieces you’re going to need to cut:
You will need four rectangular pieces for the bust piece of the gathered dress. Taking the bust measurement you got before, divided that number by two and add 1″ (2.50cm).
You have two options here for the height of the top piece. You can either do one larger top piece, or you can do a slightly shorter piece and a waistband. A waistband piece is not necessary, but I was requested to extend the length of the gathered dress after I had already cut everything out, so I added a waistband piece to mine.
If you want just one piece for the top, use the measurement you took earlier from just above your breasts, where you want the top of the gathered dress to begin, measuring to your waist, add .50″ (1cm) to the end length total. The width of each rectangle should be half of your bust measurement plus 1″ (2.50cm). Cut four rectangles.
If you’re adding a waistband, subtract 1″ (2.50cm) from the total length you took above for the bust. Cut four rectangles half the width of your bust measurement plus 1″ (2.50cm). Then cut two strips of fabric for the waistband, 4″ (10cm) tall. The length should match the total length of your top piece, i.e. your total bust measurement plus the 1″ (2.50cm) seam allowance we added. I usually cut the waistband strips just a little longer just in case.
The Straps
For your strap pieces, these can be as long as you want them to be and as skinny as you want them to be, it’s totally up to you. We created the gathered dress to tie in a bow at the top of the shoulders.
The strips of fabric that I cut were 23.50″ (60cm) long by 1.50″ (4cm) wide. You can do a thicker strap if you desire. Cut 4 strips of fabric for the straps if you’re doing the bow method.
If you don’t want your gathered dress to tie in a bow at the top of the dress then you’re going to need your exact measurement plus 1-2” (2.50cm – 5cm). Additionally, you will only need to cut two strips of fabric for this version of straps.
The Skirt
For the skirt, the length will be from your waist to your desired end length plus 2″ (5cm). You will need to cut three panels of fabric for the skirt. To find the width of each panel we will need to do a little math.
Before we start, I just want you to know that with a gathered skirt, the longer your piece of fabric, the bigger the gathering will be. If you want something really puffy, add more length to your desired skirt width.
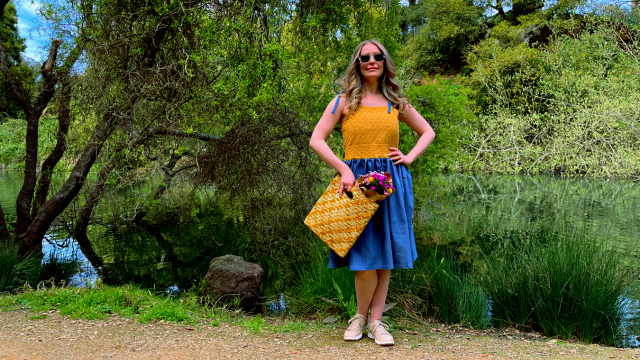
If you look at this picture of the finished dress as a reference and it’s not as puffy as you want it to be, you will need to add even more length to your total width. The easiest way to do that is to change the number you multiply your hip measurement by in the equation below. Maybe triple it or quadruple it instead of double it (that’s what we did) so you can achieve your desired volume.
One last note really quick, you should know that different types of fabric are harder to gather than others. I was using denim, and it was very difficult to gather. I probably wouldn’t increase the width of the fabric beyond the measurement guide provided below if you’re using a thick fabric. Lighter fabrics will gather much easier though!
The Skirt Pieces
To determine the pieces you need to cut for the skirt of the gathered dress, first take your hip measurement and add 4″ (10cm) to the total. The hip measurement we were using is: 34.50″ (87.50cm). To make this easier I’ll demonstrate the math below, you will just need to substitute the numbers with your measurement and the totals you get.
34.50″ (87.50cm) + 4″ (10cm) = 38.50″ (98cm). This is the total width needed for the center panel piece of your gathered dress.
For the two side panels, take the total you just got for the center panel and use this as your starting number.
38.50″ (98cm) + 2″ (5cm) = 40.50″ (103cm) ÷ by 2 = 20.25″ (51.50cm). Which is the total width needed for each of the side panel pieces for your gathered dress. Make sure you cut two pieces.
You should now have three panels for your skirt, remember that the length will be your desired length, starting at your waist, plus 2″ (5cm).
Sewing The Top Of The Gathered Dress
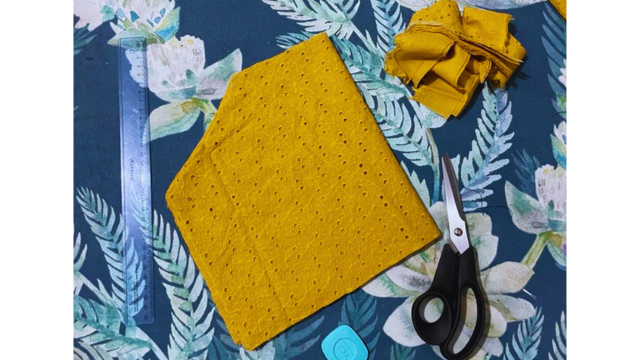
Take your rectangles and lay all four together. You’re going to need to cut a curve for the arm on both sides so the top doesn’t sit funny when you wear it. You can eyeball the curve by folding it in half and cutting all of the pieces at once.
Or measure from the top corner straight down by 3.25″ (8cm) and in from the top corner by 4″ (10cm). Cut this with a slight curve. You can cut all of the pieces at the same time if you fold it in half as shown in the picture above.
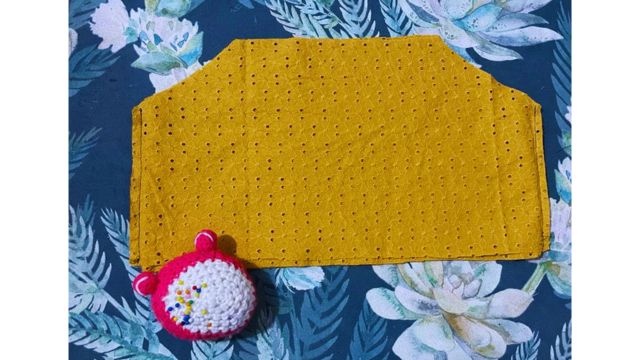
Next, take two of the top pieces and pin them along the side edge, with good sides facing. Repeat this with the other two pieces. Sew along the side edges to essentially make two tops.
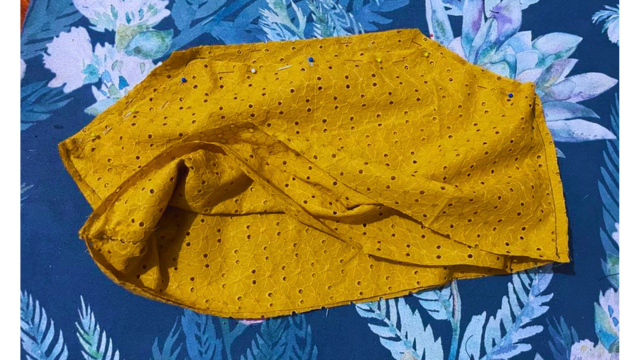
Put the two tops inside each other, lining up along the side seams and pin in place along the top edge and around the armpit. Make sure the side seams line up first before pinning. You should have good sides facing both inside and outside now.
Before you sew these together, we’re going to want to make our straps to hide inside the seam.
Fold your straps in half, good sides facing and sew them together. If you’re doing four straps to tie in a bow at the top, you can sew closed one end so that you have a clean edge when you flip them right side out. If you don’t it’s okay, you can just zig-zag stitch or overlock the raw edge after everything has been turned right side out.
Once your straps are sewn in half, turn them all right side out using a safety pin or a long paintbrush and iron them flat. I like to iron it so the seam is hidden inside and will be facing the shoulder, but you can iron it to one edge instead if you prefer that look.
Alternatively, you can use something like a bias tape maker or grab your iron and fold the straps in half with wrong sides facing. Then fold the raw edges to the inside, fold the strip in half, and press. Take your folded fabric and pin along the open edge. When you reach the ends remember to tuck the raw part to the inside. To finish, simply sew along the edge to secure everything.
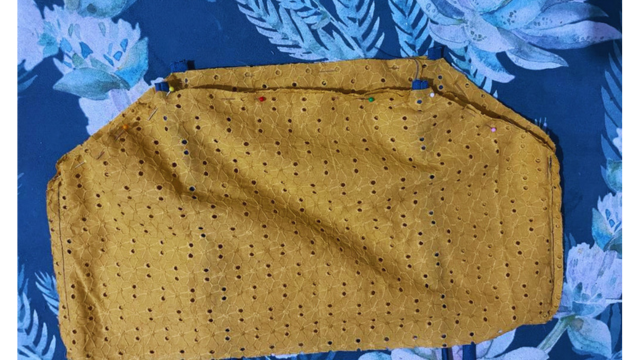
Line up the straps in the corner edges of your top piece. Be sure to leave .50” (1cm) of overhang.
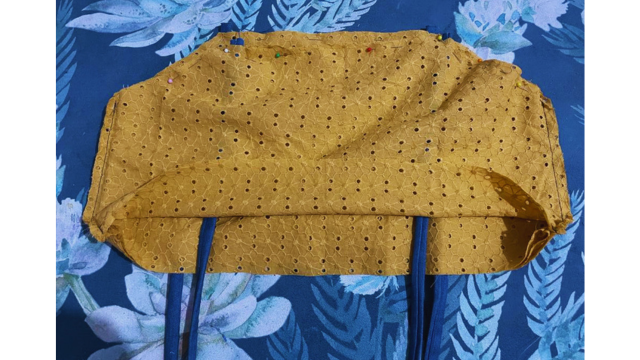
Make sure that the straps are in between the two layers of fabric. When we turn this right side out the raw edges will be hidden inside the top. Remember that there are essentially two tops being sewn together here, so we want that strap to stay sandwiched between the ugly sides of the fabric. When we turn the top right sides out, the inside of the gathered dress as well as the outside will be identical and clean finished. Make sure you put the straps between the correct layers of fabric.
Also be sure to lay your straps with the ironed seams all facing the same direction so they are identical when you turn your top right side out. E.g. All ironed edges facing outward, as seen in my picture above.
If you are doing straps that don’t tie at the top, you will need to pin the straps in place at the corners. Then turn the top right side out and try it on to make sure that the length is good for you, and that the straps lay flat and aren’t twisted in any way.
Now you can sew along the top edge, around the front, back and armpits. Creating a clean finish on the top edge when we turn it right side out.
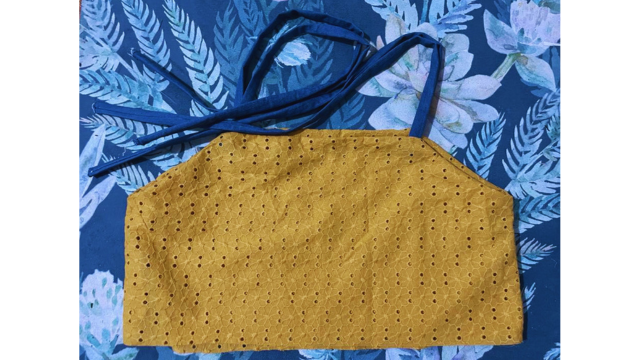
Turn your top right side out and pull the straps out, making sure everything lines up nicely.
Attaching The Waistband
If you’re not adding the waistband piece, you can move on to the next section.
Note: You could do the next step and then come back and complete this step if it’s easier for you. I’m only telling you how to do this in the order that I did it in…because that’s the order that my pictures were taken in. But while writing this I realize that doing the next step first could absolutely be easier.
Determine which side of your top you want to be the front side. Fold your top in half and mark the front center with a pin. Take your waistband pieces and fold each one in half as well, marking with a pin where the center is.
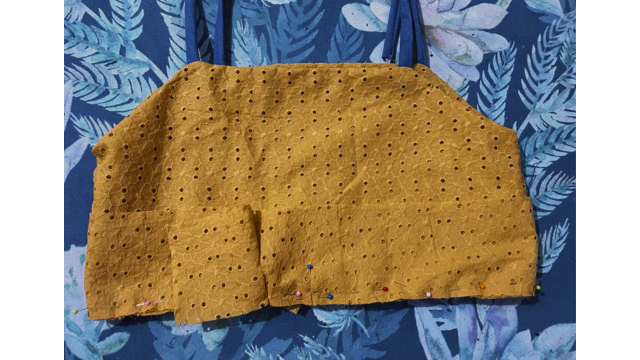
Take your two waistband pieces and pin one to the front of your top, good sides facing. Make sure you start at that center pin and work your way around to the back. I left the edges of the waistband open at the center back.
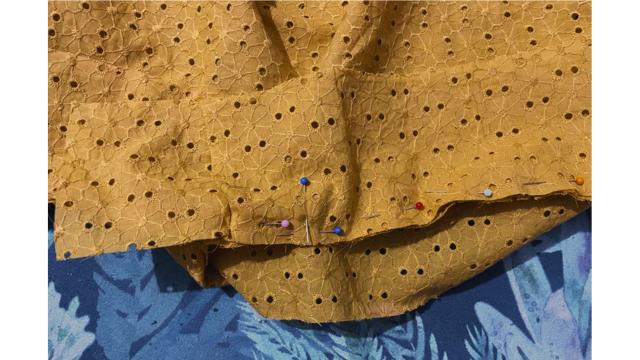
Pin the second waistband piece to the inside of the top along the same edge, good side facing the inside of the top. Again leaving the center back of the waistband unpinned. There’s no reason to sew the center of the waistband together as we’re just going to end up cutting it apart again later.
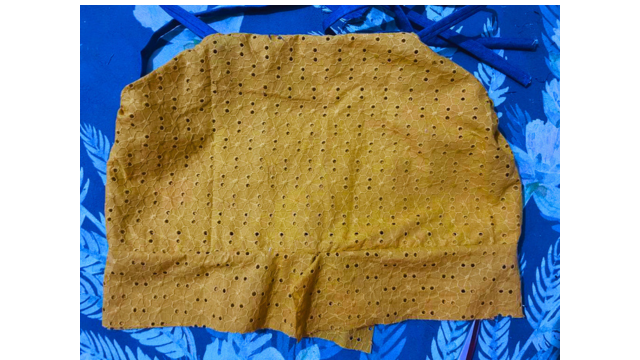
Sew along this edge connecting the waistband pieces to the top, and fold down the waistband for a clean finish.
Cutting Open The Back For The Zipper
Since we’re inserting a zipper, we’re going to need to cut open the back. We could have cut the back pieces up before sewing the entire top together, but I prefer to do it afterwards as it allows me to make sure all of the top pieces are even.

Measure the width of your top piece and find the very center of your top. Using your fabric chalk draw a straight line down the center back.
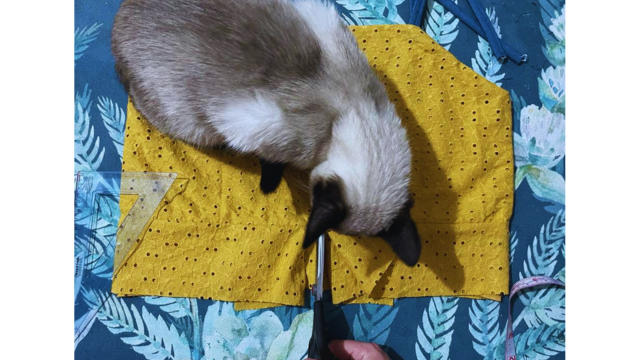
Make sure to use a heavy weight so your top doesn’t move all over the place while you’re cutting.
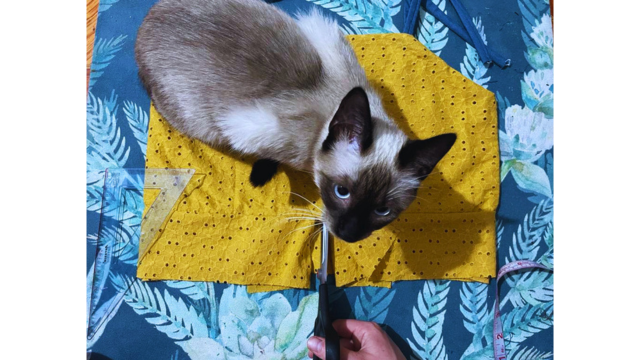
Cut through the center of the back of the top only. Do not cut throught the front of the top or through your helpful, heavy weight.
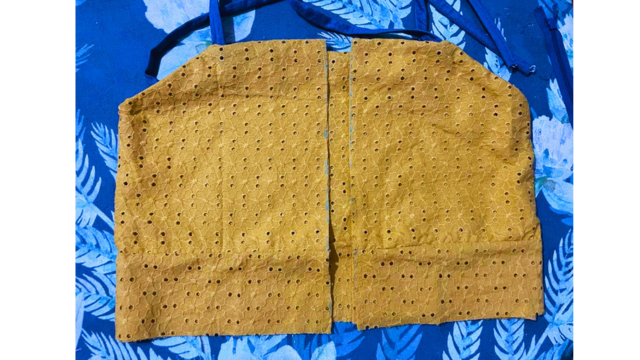
I trimmed up my waistband pieces at the same time, as they were a little long.
Set the top aside for now while we prepare the skirt panels.
Sewing The Skirt Panels
Start by laying down your center panel piece wrong side facing up. Place the two side pieces on top of it along the side seams, wrong sides facing down. As we’re sewing a French seam, make sure that the wrong sides meet in the middle. Pin these in place along the side seams and sew. Make sure you leave the center back untouched.
Trim down your seam allowance. This will ensure you have a cleaner finish when we sew the next stitch. I’ve skipped this step before on other projects and some of that seam allowance can poke out of the finished edge and completely ruin the look of your French seam. So trim it!

Next fold the fabric together on the side seams and pin so the good sides are facing. I like to tug the fabric at the side seam to make sure the fabric lays flat and is nice and tight along the side seam. Sew these together.
Gathering And Attaching The Skirt
Along the top edge of your fabric we’re going to sew a loose stitch so we can gather the skirt.
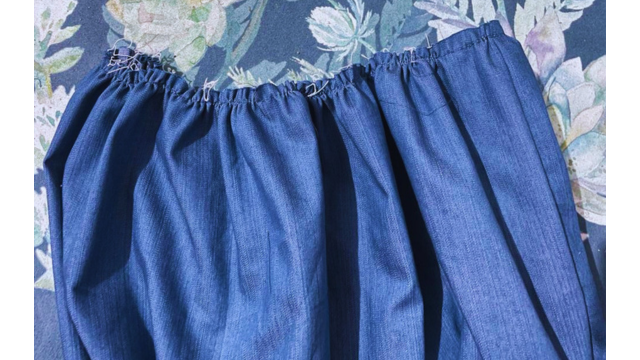
Holding one of the two strings begin to scrunch and tug the fabric to create a gather along the top edge of the skirt.
As noted before, if you’re using thick denim like I did it can be difficult to gather the fabric. You’re going to want to go slow. I broke my thread three times.
Check out this post here about Sewing Tips You Need To Learn if you need more thurough instruction on how to gather.
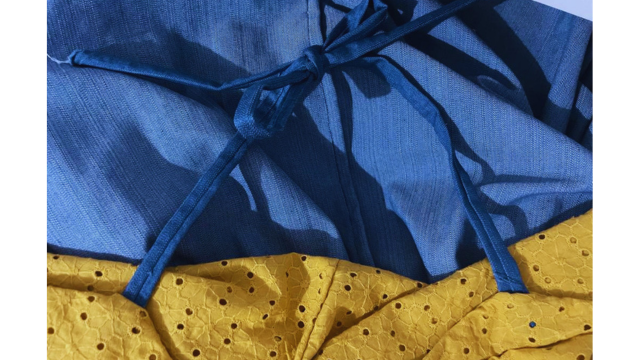
Before I attached any part of the skirt, I tied my straps in a bow to keep them out of the way. I did not want to accidentally sew over a strap while attaching the skirt.
This should go without saying, but if you are using two different fabrics, I really recommend you take the time to switch out your threads when you’re sewing a detailed stitch on each of the different fabrics. It really makes a difference on the end result of your gathered dress when the thread matches the fabric.
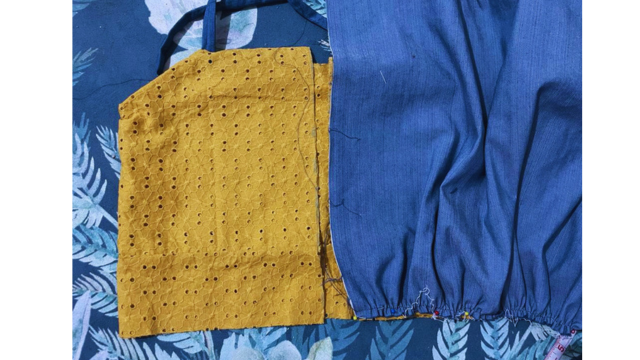
Pin the front piece of the top to the front piece of the skirt first. That way it will look perfect when we sew it in place. This picture is actually backwards, you would want to lay the top on top of the skirt in the exact direction shown in the photo. Begin pinning at the left edge of the skirt and top.
Make sure you only attach one of the wasitband layers, and also make sure you have the right side facing out. Since we ironed and pinned the straps to face a certain direction, that should be the indicator. But both the inside and the outside of the top look identical at this moment, so take an extra second to double check it.
I found it easiest to lay my top on the floor and begin by pinning the two ends first. Then extending or shortening the gather so it all fits inside the width of the top.
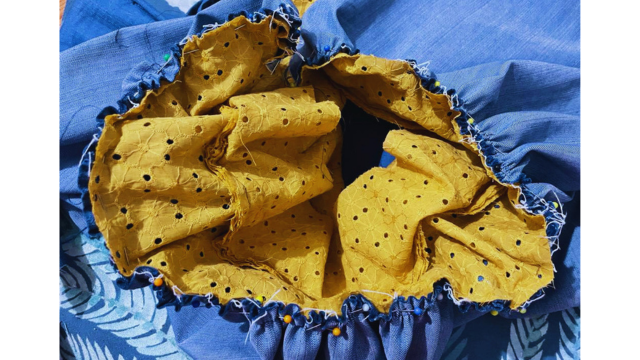
Notice in the picture above that only one layer of the waistband is attached to the skirt at this time.
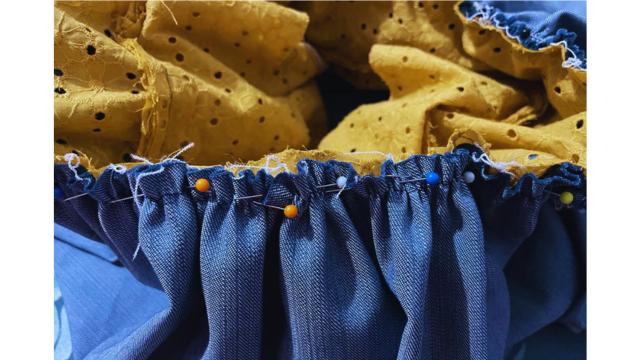
When you sew it in place, be very careful not to catch the back waistband pieces. Tug the fabric underneath out of the way if needed. I accidentally caught the second waistband at one part and had to undo the section.
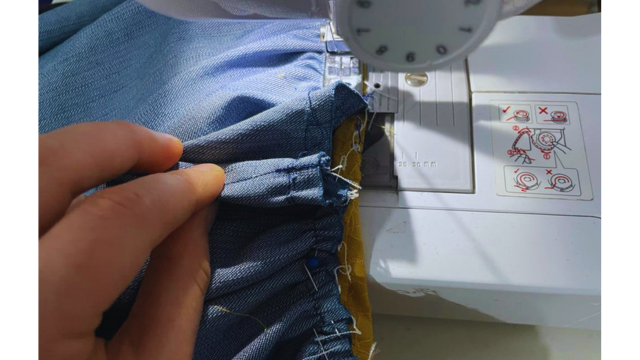
If the string from your gathering stitch breaks before you manage to attach the skirt to the top, part of mine did, I just sewed a new line. But, if it breaks after the whole skirt has been pinned in place, I had that problem too. Instead of sewing a new line you can fake it.
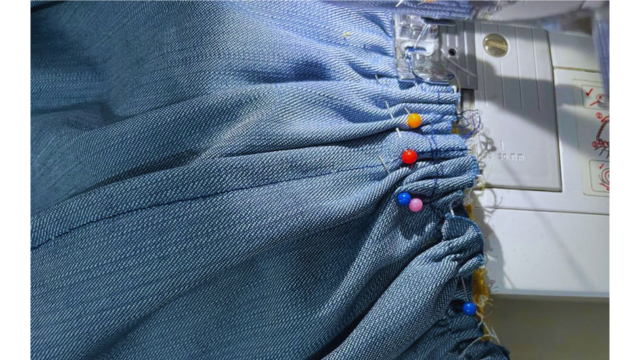
Simply gather the fabric by hand by pinching and creating a few folds. I had to pin them in place excessively. I waited until I was as close to the pins as I could get before I removed the pins, then I sewed over the gather. Afterwards I couldn’t even tell that this section had been gathered by hand.
And my sister hasn’t said anything either…so I’m guessing she hasn’t noticed yet…

Once the front of the skirt has been sewn in place we can attach the second waistband piece. You’re going to want to fold the edge of it down by .50″ (1cm) and then pin it directly on top of the raw edge of the skirt. This will create a clean finish for the gathered dress both inside and out.
In case anyone is confused about the pins along the folded edge in the right corner of the photo. Since I did not iron down the fabric before pinning in place, I find it easier to pin the .50″ (1cm) fold first, then tug the waistband piece over and line it up with the skirt edge. I hold the fabric in place with my finger and switch the pin to the outside edge.
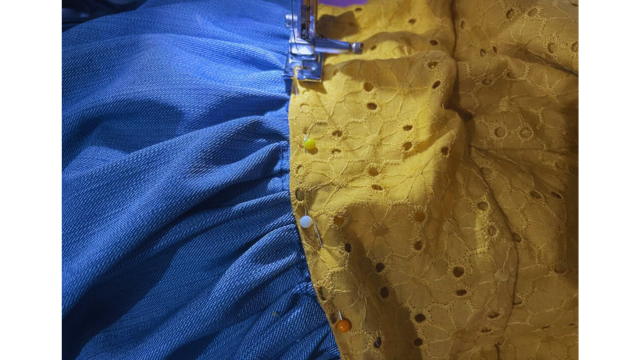
Sew along the edge to secure the second waistband piece in place.
Attaching The Zipper
Fold your fabric in half, with good sides facing along the back seam. Create a basting stitch along the length of the back seam. Make sure you are sewing far enough from the edge so that you create two flaps that are wide enough to fit your zipper.
Pin your zipper in place on both sides of the seam. Make a mark 2.50” (6cm) up from the very bottom of the zipper, this is where we’ll stop sewing along the zipper. You can find detailed instructions with pictures of the zipper installation here if any of this doesn’t make sense.
Make sure the top zipper stopper lines up with the very top edge of the dress. I actually sewd my zipper too low and had to seem rip the whole zipper and move it back up. So make sure your zipper stopper lines up with the top edge of the dress.
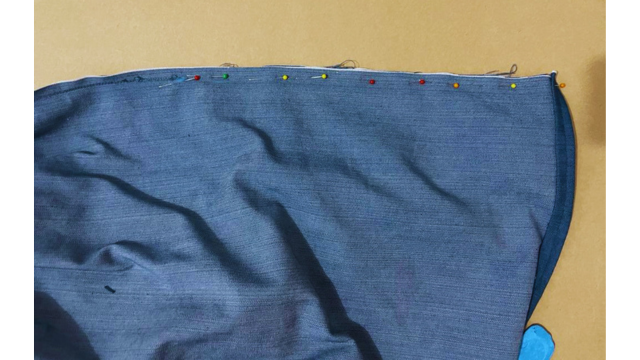
Going down from the 2.50” (6cm) mark below the zipper, pin the rest of your fabric below this mark and sew with your regular straight stitch to finish the bottom half. We’ll finish the hem later in case something doesn’t line up correctly.
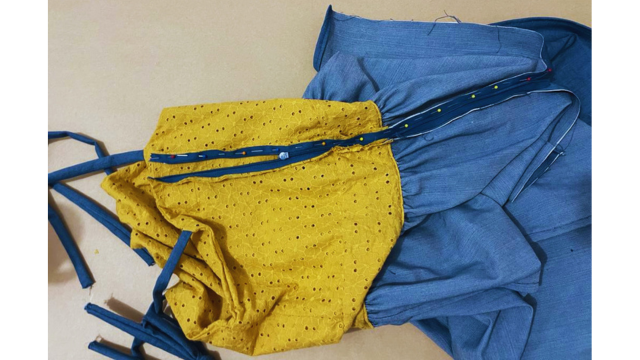
Remove the basting stitch that goes up from that 2.50” (6cm) mark, but do not remove the pins holding your zipper in place.
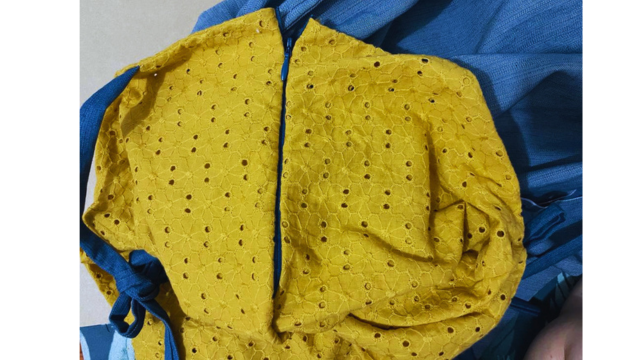
Close your zipper to ensure everything lines up correctly before sewing in place.
If you used two different color fabrics, you should make sure when the zipper is closed that all of the seams line up perfectly. You will notice if something doesn’t line up right, especially where the two different color fabrics come together.
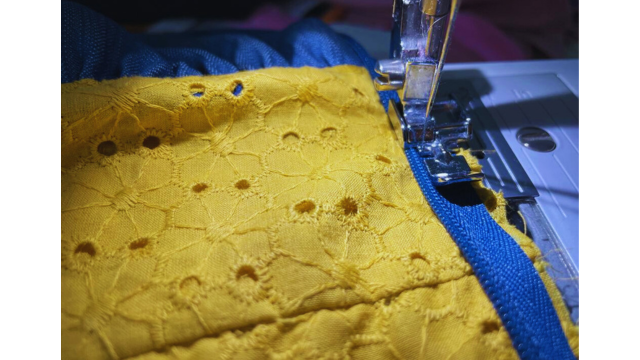
If everything looks good, you can proceed with sewing the zipper in place.
To finish the top flap edges of the zipper you just need to fold them to the inside of the dress and put a couple of stitches in the top of each one.
After you’ve finished sewing the zipper in close your zipper one last time to ensure everything is in place and sits properly.
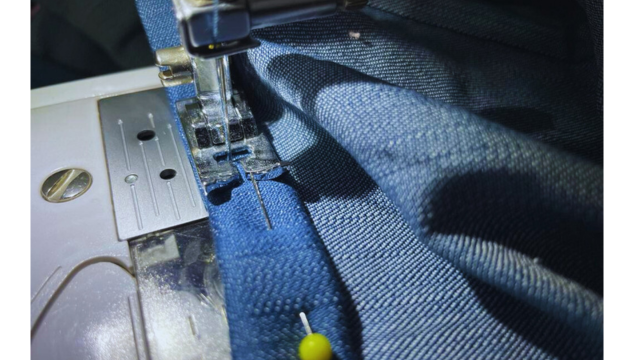
Finally, create a rolled hem along the bottom edge to finish the gathered dress.
The Finished Results



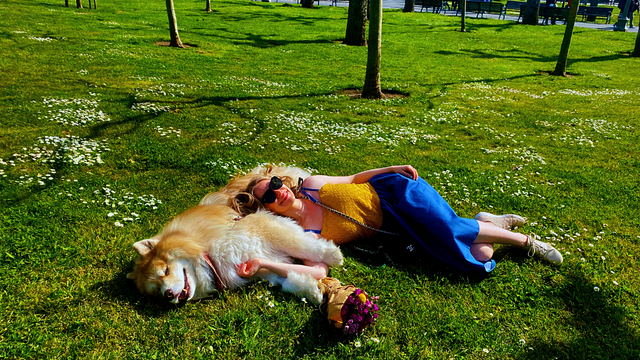
I hope you liked this dress tutorial and found it as easy to make as I did! Please don’t hesitate to drop any questions in the comments section if anything isn’t clear and I’ll do my best to assist you!
If you decide to give this project a go, tag me on Instagram @doorsandfloorsblog and use the hashtags #SewingCat and #D&FBlog so I can see what you make!
Check out our Tutorials tab for more DIY projects!
Explore other recent posts:
- Remote Work Life in Perú: Introducing The Chickens
- How To Make A Kids Scrap Fabric Top: Design #3
- The Truth About Working Remotely In Perú
- How To Make An Eyelet Top Out Of Scrap Fabrics: Design #2
- 10 Interesting Restaurant Culture Shocks From Eating Out In Perú
Find us on social media!
P.S. Looking for a fun activity you can do with a friend while working on tedious crafty tasks, download our free trivia here.
Playing trivia is a great way to keep your mind active and have fun with your crafty friends and family while busting out those seam ripping, crocheting, and other time-consuming, but necessary, crafty tasks.
